Wednesday, February 15, 2012

Break-Away chair

This break-away chair was a feat of engineering created by Maria Defabo and I for the current production at Lookingglass theatre. The chair needed to break each night, but needed to be sittable for several scenes before the break. To make things more difficult, there is an identical chair sitting right next to the trick chair, so any major alterations to the structure and shape of the chair would have been immediately obvious.
This is how we did it. 
This first photo shows you the chair untouched, after removing the black fabric from the bottom.
First we removed the piping and pulled all the staples around the front edge so that we could pull back the fabric. 
Next the cushion was removed. 
Then we cut and removed all of the springs (leaving them on made it impossible to alter the chair as they kept pulling things back wherever we made a cut).
We also removed the corner braces on each of the front legs so we could rig them to break.
After all of that was removed, this is what the under side of the chair looked like.
To start the rigging, I cut off the front part of the chair,
And cut it into three pieces.
We added a piece of plywood, cut to fit the chair, in on the top side of the seat. Partially this was to support the weight of a person sitting on the chair (the job the springs used to do), and partially it was to reinforce the rest of the chair frame, so that only the parts we wanted to break actually broke. 
We added an identical piece on the bottom side of the frame, creating an incredibly strong box under the seat.
To make the legs break, we created these wooden pieces. The holes are where they are bolted onto the frame, and the break occurs along the scored cuts in the center.
Each show, a new breakable pieces is bolted in across the break on each leg. On the front of the chair, the breakable legs attach to the center piece with small bits of dowel.
'
Finally we staple the bottom black fabric back in place
leaving just the corner open, so that the chair can be re-rigged. After rigging, a couple of strips of gaff tape hold the fabric in place so that, until it breaks, the chair appears to be in perfect, untouched condition. 


Friday, February 10, 2012

Never be Afraid to Ask...Branches

For this spring's production of Brother's of the Dust at Congo Square theatre, the designer wanted two trees on the set. They weren't terribly large, about ten feet tall each. I know there are other technicians who will argue with me about this, but I decided to use real branches to make my trees.

Side Note: I have heard stories about problems with moss, dry rot, bugs etc and know people who refuse to use real branches for something like this. In my experience though, there is no good way to make a fake tree look real. My policy is just to be extra careful with what I bring into the theatre. 


There are some places where locating several large branches that I can take, cut, bend and twist into trees would be as simple as walking outside the back door of the theatre. In the middle of Chicago though, large branches can be harder to come by.

While props shopping for the show I drove past an empty corner lot with a pile of large branches in the center of it; exactly what I needed! I pulled over and called the number on the large sign on the chain link fence. I explained to the woman who answered the phone who I was and what I needed. She spoke briefly to her boss and then told me that I was welcome to whatever I needed. I could untwist the wire holding the gate together and walk right in as long as I closed the gate when I was done.

I drove home, grabbed my cordless Ryobi circle saw, went back to the abandoned lot and collected my branches.

When I installed the branches onstage I had a bit of trouble because they were dryer and more brittle than fresh cut branches (which often bend easily and can be secured in place with a screw). But I was able to reattach the branch to itself where I needed to and add other pieces and sticks in where it was looking bare. I hot glued a small amount of leaves onto the tops of the trees to finish them off and it ended up working perfectly.

Sunday, February 5, 2012

The highest compliment

A couple weeks ago a friend of mine asked if he could borrow some of my fake ice cubes for a show he was working on. I told him he could, but finding a time to meet up with him to hand them off proved to be a challenge. Eventually we decided that I would leave the ice for him wedged in the door outside the office for his church, where he would be later in the day for choir rehearsal.
When I dropped off the ice I sent him a quick text double checking that I had left them in the correct place.
A couple hours later we had this exchange of text messages:

Tim- Hey. Sorry I didn't see this. Rest assured I have it in my possession. Thank you!

Me- That's okay. Glad you found it.

Tim- Karie thought it was real ice and put it in the freezer. lol

Me-That's awesome. My work can receive no higher compliment.

Tim- Certainly not!

That someone could see a sandwich bag full of fake ice cubes I made, pick it up and carry it to the freezer and continue to believe the ice is real, made my day. Though I have to wonder what this woman must have been thinking was the purpose of someone leaving a sandwich bag full of ice, with a pink sticky note with Tim's name on it inside the door to the church.


Monday, January 30, 2012

Roman Shields

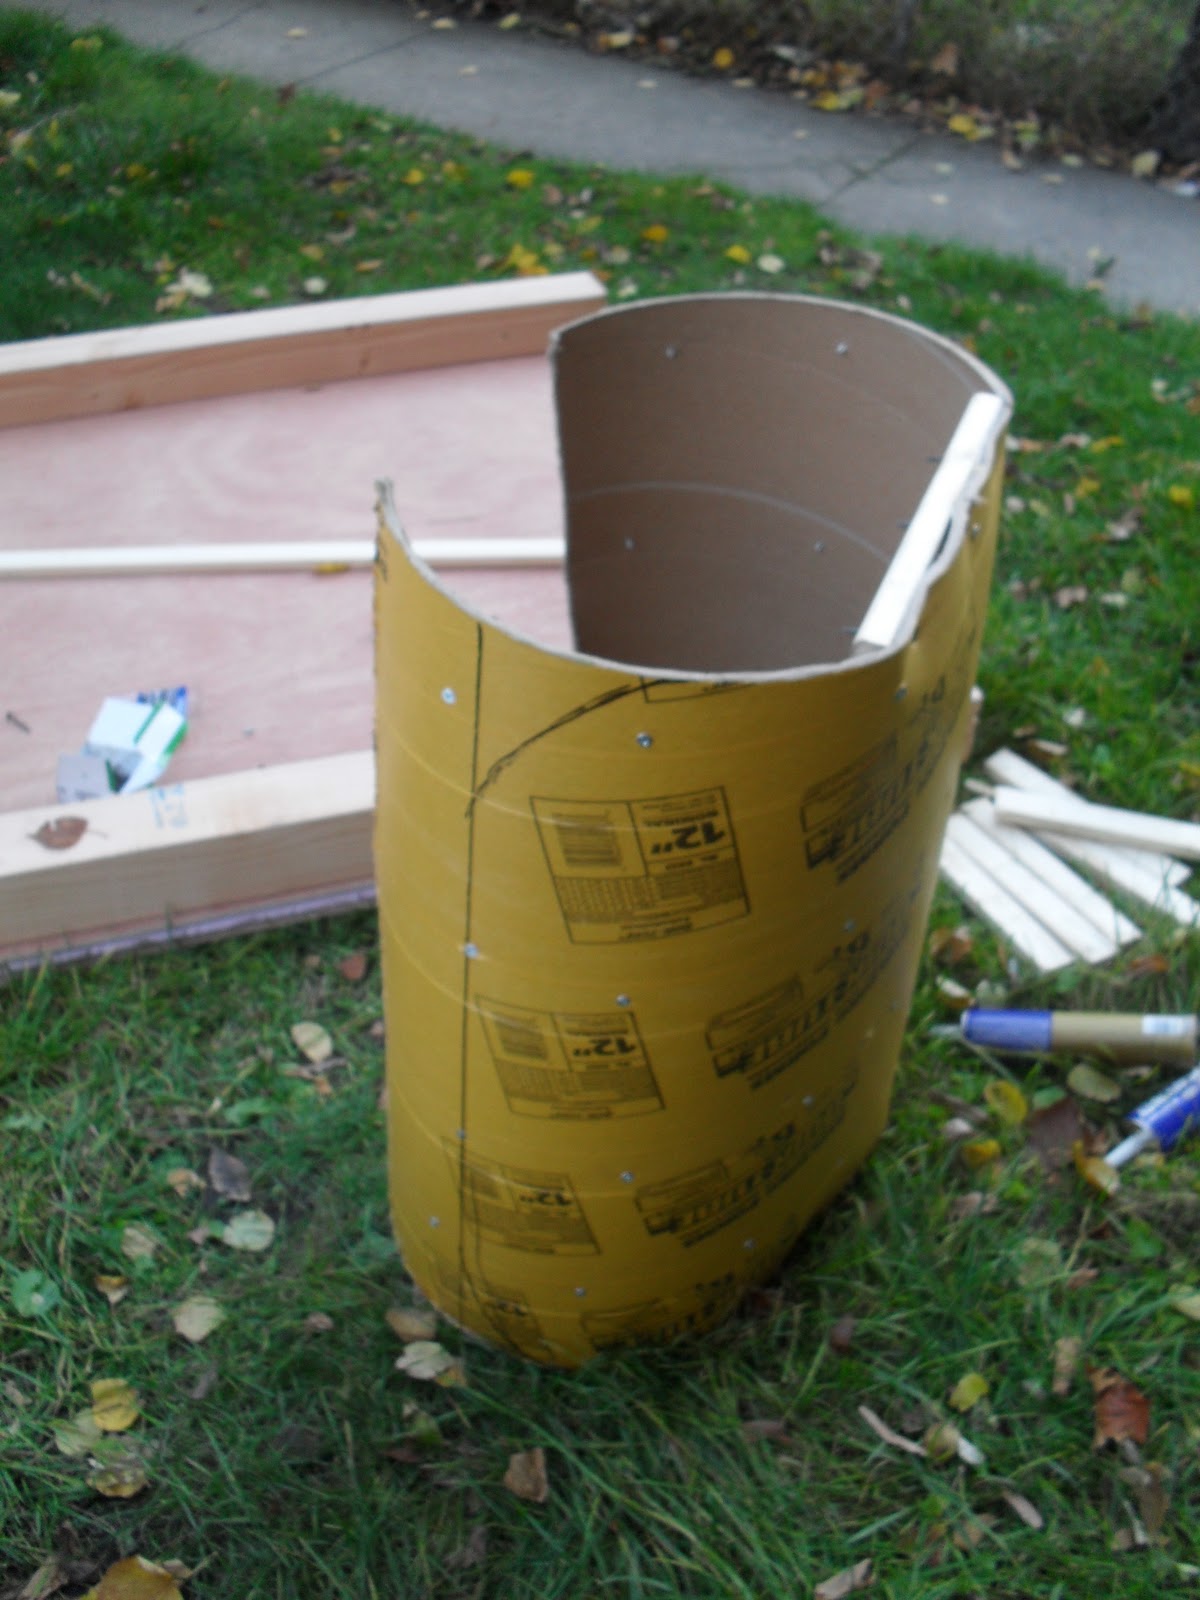
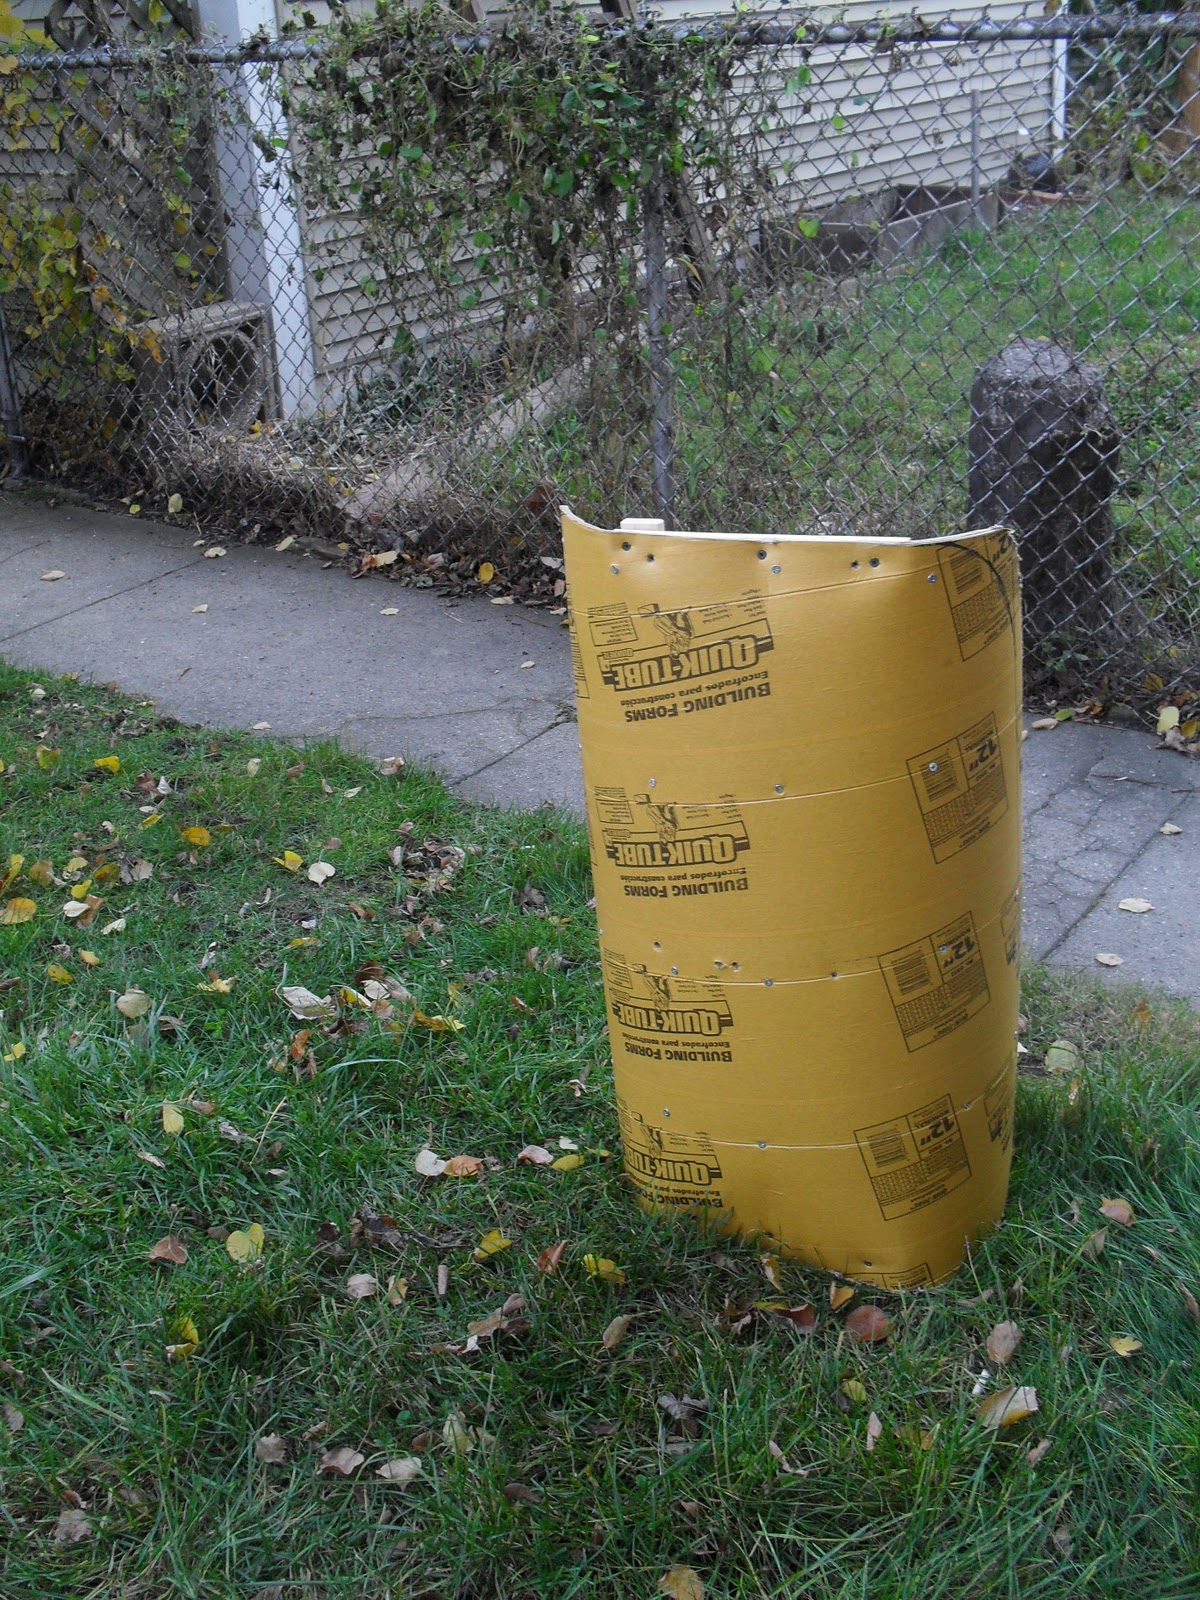
For the "re-mount" or The Black Nativitty at Congo Square Theatre (I put re-mount in quotes, because you should never believe anyone when they tell you that a show will be a re-mount and therefor less work because "we already have almost all of the props."), we had three roman soldiers who needed swords and shields.They needed to be light, so they could maneuver while dancing, and large enough to be intimidating. I was told historically they were intended to cover from the neck mid-calf, but we compromised on shoulder to knee. To create the tricky curved shape of a roman shield I decided to start with round concrete-form tubes. 
I started by slicing two tubes vertically and placing one inside the other.
To pull the tubes open to a wider curve, I placed them on Rowdy (that's the name of our beer can party cooler). I spread some liquid nails between the layers,

and then screwed in a number of small screws around the edges. The thought was that the glue and the screws would prevent the two layers from sliding back past each other, and would force the cardboard tubes to hold their shape in the wider curve.
Unfortunately that didn't work as well as planned, I believe because the cardboard is too soft and allowed for more flex and movement around the screws.
For my second attempt to spread out the curve I added chunks of 1x2 at the top and bottom.
While the 1x2 pieces did help to spread out the cardboard, they also left the cardboard looking a bit twisted and warped.
To finally straighten out the shields I ended up adding verticals to create a full frame on the back side of each shield.
I trimmed the edges and rounded the corners to finish the final shape of the shields. The flat 1x2 frame left the shields looking a little squished and messy at the tops; a uniform coat of paint helped hide this, and from the audience no one ever noticed but me. If I were to make these again, however, I would probably cut the curve I wanted from a piece of plywood and use that in place of the 1x2 to get a cleaner line. 
To give the finished pieces the look of being made of metal I used a roll of aluminum tape to cover the edge of each shield. Once they were painted I used a light piece of sandpaper to sand the color back off the edges. It made the shields look used and a bit roughed up, and the metal peeking through the scratched paint in those places tricked the eye into believing that there must be metal under the paint on the entire shield. 
for the actors to hold the shields I attached two strips of industrial 2 sided velcro (sold in hardware stores for bundling cables and tying down supplies in trucks). 
The two-sided velcro allowed each actor to custom fit the straps to fit snuggly on his arm each night, and to get in and out of the shield quickly. 
I used a coat of red spraypaint to color the shields. Here is another thing I would do differently next time. The concrete tubes have a waxy coating on them which the paint didn't stick very well to. It scratched off easily and I had to do several touch-ups as we were going through tech. Next time I would sand the surface of the shield before painting or dust it with spray adhesive first to give the paint something to adhere to.
To paint the shields I blew up a picture of the roman shield pattern and printed 1/4 of it (the design is symmetrical and printing only 1/4 allowed the design to fit on a legal size paper so I didn't have to pay for a large format printout). I then glued the printout to a piece of posterboard and cut out my stencil.
Then slowly over the course of the night, allowing each section to dry before spraying the next to avoid smearing paint, I painted each section of the three shields. 
Unfortuantely I never got around to taking a final picture of the completed pieces, but this gives a pretty good idea of how they turned out.

Sunday, January 29, 2012

This is my job...accepting morbid situations

Lesson from tonight- 
It doesn't matter if they are actors in the show (or the writer for that matter) and know exactly what you are doing and why you are doing it; when you are sitting on the floor in the lobby of the theatre, sewing dummies up in sheets, everyone will look at you funny.


Wednesday, January 25, 2012

To my high school physics teacher

A couple of nights ago I was called into a theatre, where I regularly work, to help last minute, with a special effect that the designer was having trouble with. Almost immediately I saw the problem. The spring he was using to power the mechanism was in the wrong place, and even better, it could be easily moved. "The spring is too close to your pivot point," I told him, "If you put it here instead, the spring has to do far less work to achieve the same result." Hearing an explanation like that come out of my mouth solidified my need to write this post.

In high school I disliked science. To be perfectly honest, all the way through school, science was my least favorite subject. That probably had something to do with the fact that I was an over-achiever and a perfectionist, and my lowest grades were always in my science classes. But also I think it had quite a bit to do with my confidence that science would have nothing to do with my life after graduation. I was going into theatre after all, why did I care about DNA pairing or the periodic table? Junior year of high school though, I took a physics class with Mr Wojak. He was fun, he cracked jokes, he broke information down with clever analogies and sometimes songs.

Having so much fun in Mr Wojak's class gave me the confidence to try physics again in college when the chance came up. I worked harder to understand that class than almost any other I took in all four years. I found a homework buddy, and together we worked through the assigned problems once a week, then, almost without fail, the two of us would parade over to the professor's office to ask him to explain that one problem (or two or three) neither of us could figure out.

And the point of all of this is that it worked. Though I had no idea at the time that I would use these things (I was just doing it because I had to take a science course and physics had been the only science I had ever previously enjoyed), it turns out I use my physics knowledge more on a daily basis than almost anything else I learned in the course of my schooling. I rarely use the specific formulas, and when I do I have to look them up, but I use the knowledge, the understanding of forces and how they relate to one another, every day.

I use my physics knowledge to understand how to re-enforce a piece of furniture so that it will withstand the abuse of actors using it every day through the run of a show. I use my physics knowledge when I am constructing a puppet, to understand how to use the potential energy of a spring to make a head nod or a mouth talk. I use physics to construct all sorts of rigging, knowing how to use pulleys and angles to direct force so that a magic trick can be triggered by someone across the room. I use my knowledge of friction and forces to analyze and understand gears and levers, allowing me to take apart, fix and reassemble broken antiques (a lighter, a clock, a hand powered drill, etc). I could go on for pages with specific examples of projects that have asked me to use my knowledge of physics, and I'm saying this now because no one ever told me. Even once I decided I was going to go into technical theatre, I don't remember anyone recommending I take a physics course.

For several years after college, as I started to do more and more of this type of work, I thought that these things I was working with were common knowledge, logical reasoning, a basic understanding of the world. Recently though, I have realized that this knowledge is not as obvious as I had believed. Not all of my colleagues have these skills. My strong base of physics understanding sets me apart; it is a specific specialty I have and an advantage in the job market. So thank you to Mr Wojak, and to my college physics professor (whose name I am ashamed to say I have forgotten), though I am sure I did not show you enough appreciation at the time,  the lessons I learned from you have turned out to be incredibly valuable. And to any current technical theatre students, look into your university's physics offerings, you'll be glad you did.

Friday, January 20, 2012

Independently controlled clock hands

Another post where the pictures are not as awesome as I would like (the next three or four might be like this) but the project was cool so I'm posting it anyway. 
This clock needed to have two independently controlled hands so that the time could be reset by the actor every few minutes (when he would pop through the face as a Cuckoo clock bird.
For the actor, we marked each time on the back and gave him an exact landing point for the wire he was moving (since he had no visual of the front of the clock).
The minute hand was attached to a 2" copper tube. On the front side this simply required a bit of glue, and a bit of gaff tape, to hold the foam-core clock hand to the tube. On the back side, to affix the wire the the actor manipulated to the tube, I needed to use JB weld (if you haven't used it before, JB weld is a two part adhesive designed specifically for attaching metals, it is available at most hardware stores and is amazing).

Once the hour hand was set, the minute hand was easy. I attached the hand on the front directly to my wire, fed the wire through the copper tube, and bent it over in the back to make it easy to turn.
While the back of the clock looks pretty silly when the hands started moving on the front of the clock it looked pretty magical. 

Sunday, January 15, 2012

Just because I'm impressed ...

Every year at christmas I am excited to see what sort of new lights come out. In the past few years, as LED technology has progressed rapidly, there seem to be newer and cooler versions of small battery operated LED lights every season. 
In this show (a twist on a pretty typical cabaret show) we decided it would be cool for the music binder to glow when the magic arrived and the music began.
This year martha stewart came out with a line of LED lights that were about the size of a grain of rice, and ran in series along two thin, uncoated wires (those little white flecks in the image above are the lights).
When one string of lights, shining out from behind the pages wasn't enough, I decided to fold the lights into a piece of reflective tape, to try to multiply the points of light.
The tape worked reasonable well, and the light got more and more impressive (to me) as I added a second and a third strand.
The whole rig was almost invisible when the lights were off, and I hid the battery pack inside a hollow stack of foam core, that blended perfectly into the stack of sheet music.
In this image, and the one below you can see (sort of) the lights lit inside their rig. (it was considerable more effective in a dark theatre.

I wired a switch into the circuit, and placed it on the side of the book where it was very easy for the actor to slyly flip it on. 
It worked like I wanted it to, I was very proud of it, and then during tech it was cut. What it came down to was that, as impressed as I was with my new toy (these awesome new lights), the director wasn't. This in no way should be taken as a bitter statement. The director wasn't impressed because, while there were over 90 points of light around the edge of the book, they were still visible as individual points of light. For a show where all of the other magic was smooth and crisp, this book still looked like a "trick."

When I looked at the book, my thought was, "that looks like magic, because before now I never could have put so much light in such a small space." The audience doesn't know how hard that is, and would probably just think, "look they hid a light inside that book."

This was still a really great project, a great experiment with some new technology, and something I might copy again on a different show, with a different feel, where the audience is a bit further away. For this specific show though I had to be willing to let go of something I liked, because it wasn't working in the moment with the rest of what we were doing.