Today I learned that this...
is called a "meat dome" which is why my searches for "covered silver tray" and other variations of those terms, were coming up empty.
I also learned that they are VERY expensive, and I will be making one instead of purchasing one.
Showing posts with label shopping. Show all posts
Tuesday, April 15, 2014
Sunday, December 15, 2013
Never be afraid to ask...for WAY more than you can afford
An Inspector Calls at Remy Bumppo, turned out beautifully, with a huge beautiful oriental rug and beautifully finished wood furniture.
When we started work on the show, and the set designer sent me research with images of the type of furniture he was imagining, I was worried. I knew my budget was not enough to be able to purchase anything.
Then, when I discovered that none of my go-to rental sources had anything, I was even more worried.
I hoped that I would find someone on craigslist selling something beat-up that I could repair, or something they didn't know the value of. But after weeks of looking I had nothing.
While out running other errands in the city, I drove past an antique store that I hadn't been in for years. I had long ago ruled it out as being more expensive that I could afford on any of my budgets. I figured it couldn't hurt to stop in, and I was desperate.
Walking into the store I immediately knew I had to find a way to work with them. The furniture in the store was right out of the research images.
I approached the owner and told him the situation. I had $X to spend and knew that was far less than he should charge me for a rental of all the pieces I wanted. I could offer him comp tickets to see the show and an insert ad in the program (with a guesstimated value of $X, which would be seen by approximately X number of people). I would take responsibility for the safety of the items while they were in the theater's possession, and the show itself is fairly tame, no large fights, no one treating the furniture roughly etc.
I was also able to provide him with a copy of the company's insurance policy, to assure him that, should some unforeseen incident harm his pieces, we would be able to compensate him.
He agreed to the rental and we have a beautiful dining room set with a table, six chairs, two beautiful gold mirrors, an overhead light fixture, and buffet and a marble top server for exactly what I had in the budget.
As precautions to preserve the condition of the furniture, we made sure to tell the cast and the set construction crew that it was rented and valuable, so that they take extra care with it. I have also given the ASM some nice furniture polish and rags. Every evening after the performance she wipes off and polishes the top of the dining table, to make sure no drops of liquid from the show are left on it, and to keep it in beautiful condition.
Monday, November 25, 2013
Some things are worth paying more for: Percussion
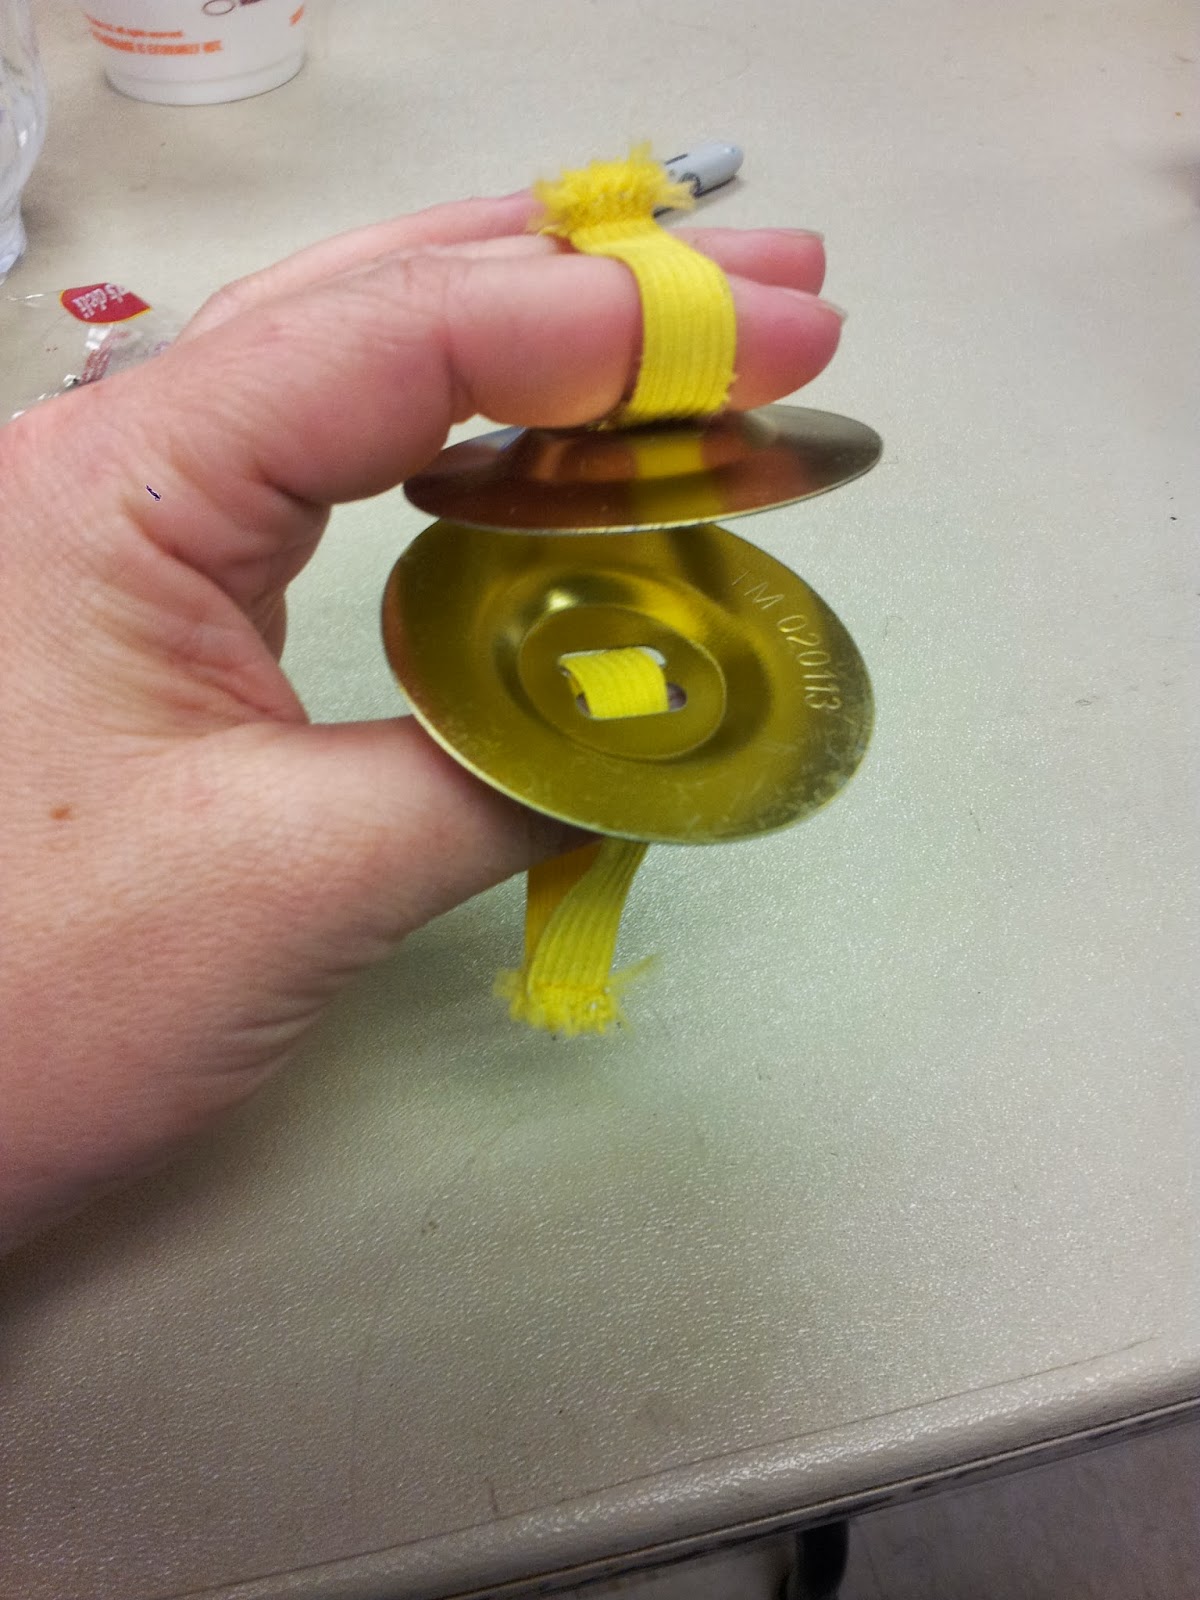
For Paulus at Silk Road Rising, the director had an idea to create a theatrical moment out of falling coins with actors in the wings using finger cymbols. He sent me an email suggesting it late in the rehearsal process and included a link to a novelty site where some could be purchased for $1.25 each.
I placed the order, and they showed up looking like this, and sounded exactly as bad as they should have for the price.
No matter how we tried, we couldn't get the cheap flat metal to make anything resembling the nice loud ring we were imagining.
After crunching some budget numbers I decided to give up the cheap cymbals as money gone and lesson learned. I purchased these real finger cymbals at a local music store. They were $20 for 2 pairs, 10x the amount of the cheap ones, but worth every penny in making an effective theatrical moment.
Sunday, October 20, 2013
Blood Jam
I'd like to take a moment to recommend a relatively new company producing fake blood for stage and film, using a unique recipe. The company is called Gravity and Momentum and their product is called Blood Jam. They are a local Chicago company, headed up by Greg Poljacik and Chris Yurwitz.
On a recent production, I decided to take a chance on something new, I'd been hearing a bit of a buzz around about a new blood that people wanted to try, but hadn't specifically talked to anyone who had tried it. I read a few testimonials online, was impressed by the ease with which people claimed the blood washed out, and decided that a show with a white painted set, where the actress in the white cotton dress gets coated in blood was a good place to test that.
I ordered a gallon of the blood jam. The costume designer and I tested the blood on some scraps of fabric and were very impressed. On the first preview, when the actress walked out onto the stage, we were disappointed, the yellow light was reacting all wrong with the colors in the blood. As the director told me in notes, "I wasn't sure if she'd just murdered someone, or if a cat had peed on her." Not the reaction you want.
I called up Greg and asked him what I could do. The blood needed to be darker and more opaque. He immediately offered to make me a whole new gallon in a darker color to suit my needs, and offered some advice on adding a few drops of green food coloring to the batch we had, in order to adjust the color until a new batch could be created. The adjustments worked fantastically, and the new batch I received two days later looked even better.
Also to the delight of the costume and set designers, we have yet to see a stain on either the costume or the set after a full week of previews.
After working with the blood, and hearing from many others who knew Chris and Greg about how awesome they are, I wrote Greg to ask a few more questions. Here are the questions and his answers.
I heard from someone at Oak Park Festival that you taught yourself chemistry in order to figure out a way to make an edible, non staining blood. Can you tell me a little be more about how this came about? Where you went to for information?
I still remembered the chemistry basics from high school and I looked up information needed to fill in gaps as I experimented. I had worked on a show where I claimed I could make a blood that was edible and washed out (before I created Blood Jam) and was extremely embarrassed/humbled when I realized how truly tough that is! I went through and played with every known recipe out there. It didn't make sense, however, that it couldn't be done. So I put together some ideas and would chase each one down to see what happened. It took a full year of non-stop failure till I finally, accidentally, created the recipe for Blood Jam. It was a process that built on the successes and failures of each previous experiment to capitalize on what worked/didn't work and why. The best way to learn the practical side of chemistry!!
I went all over for info. I asked people, searched the web, read blogs and interviews of other blood makers, looked at other blood products, and tracked down product info from companies to figure out the chemical pieces I needed. Some stuff was hard or impossible to find so I had to infer many pieces and extrapolate info from one area and trust it would hold true for what I was doing. Much of the chemistry came from trying to understand what I had created after the fact! The original hypothesis would work (or not) and I had I figure out why the result was doing or not doing certain things before moving on. Fun and frustrating at the same time!
How do you two know each other, and what gave you the idea to partner on this venture?
We have been close friends for eight years. My wife met Chris first through theater friends. Our close circle is considered family, when I told them what I was working on, none were surprised id be tinkering with this sort of thing, and everyone wanted to help in some way (and everyone definitely has!) Chris was able to financially get the company started and his business sense is what keeps the company grounded. He likes to say he is the Gravity and I am the Momentum (our company is Gravity and Momentum LLC). Without his grounding I would have flown in too many directions after the next project interest and ran the company bankrupt real fast!
What's next? Any new products in the works?
The immediate goals for the blood is to continue to tweak the color so that its the perfect blend for thickness and for when it gets thinned out. We nailed the washing/edible obstacle but the color obstacle is still quite difficult to get. Small adjustments one way or the other can make the blood look too brown, purple or orange when thinned out. Ideally we get it to the sweet spot where it looks like a nice, real red when first deployed and settled to a realistic dried bloodbrown over time.
We are also continuing to tweak the powder so its able to be applied to the skin more easily and discreetly. The powder works wonderfully for caplets, and would be crazy cool as a water activated effect on skin!
I am also playing with Fire Gels and starting data research on the effect of performance on the actor and audience. (See why Chris is vital! All over the place!). This is on top of still teaching, doing stunts and choreo! Soo, it may be a while till we finish but we planning on being around for a bit.
On a recent production, I decided to take a chance on something new, I'd been hearing a bit of a buzz around about a new blood that people wanted to try, but hadn't specifically talked to anyone who had tried it. I read a few testimonials online, was impressed by the ease with which people claimed the blood washed out, and decided that a show with a white painted set, where the actress in the white cotton dress gets coated in blood was a good place to test that.
I ordered a gallon of the blood jam. The costume designer and I tested the blood on some scraps of fabric and were very impressed. On the first preview, when the actress walked out onto the stage, we were disappointed, the yellow light was reacting all wrong with the colors in the blood. As the director told me in notes, "I wasn't sure if she'd just murdered someone, or if a cat had peed on her." Not the reaction you want.
I called up Greg and asked him what I could do. The blood needed to be darker and more opaque. He immediately offered to make me a whole new gallon in a darker color to suit my needs, and offered some advice on adding a few drops of green food coloring to the batch we had, in order to adjust the color until a new batch could be created. The adjustments worked fantastically, and the new batch I received two days later looked even better.
Also to the delight of the costume and set designers, we have yet to see a stain on either the costume or the set after a full week of previews.
After working with the blood, and hearing from many others who knew Chris and Greg about how awesome they are, I wrote Greg to ask a few more questions. Here are the questions and his answers.
I heard from someone at Oak Park Festival that you taught yourself chemistry in order to figure out a way to make an edible, non staining blood. Can you tell me a little be more about how this came about? Where you went to for information?
I still remembered the chemistry basics from high school and I looked up information needed to fill in gaps as I experimented. I had worked on a show where I claimed I could make a blood that was edible and washed out (before I created Blood Jam) and was extremely embarrassed/humbled when I realized how truly tough that is! I went through and played with every known recipe out there. It didn't make sense, however, that it couldn't be done. So I put together some ideas and would chase each one down to see what happened. It took a full year of non-stop failure till I finally, accidentally, created the recipe for Blood Jam. It was a process that built on the successes and failures of each previous experiment to capitalize on what worked/didn't work and why. The best way to learn the practical side of chemistry!!
I went all over for info. I asked people, searched the web, read blogs and interviews of other blood makers, looked at other blood products, and tracked down product info from companies to figure out the chemical pieces I needed. Some stuff was hard or impossible to find so I had to infer many pieces and extrapolate info from one area and trust it would hold true for what I was doing. Much of the chemistry came from trying to understand what I had created after the fact! The original hypothesis would work (or not) and I had I figure out why the result was doing or not doing certain things before moving on. Fun and frustrating at the same time!
How do you two know each other, and what gave you the idea to partner on this venture?
We have been close friends for eight years. My wife met Chris first through theater friends. Our close circle is considered family, when I told them what I was working on, none were surprised id be tinkering with this sort of thing, and everyone wanted to help in some way (and everyone definitely has!) Chris was able to financially get the company started and his business sense is what keeps the company grounded. He likes to say he is the Gravity and I am the Momentum (our company is Gravity and Momentum LLC). Without his grounding I would have flown in too many directions after the next project interest and ran the company bankrupt real fast!
What's next? Any new products in the works?
The immediate goals for the blood is to continue to tweak the color so that its the perfect blend for thickness and for when it gets thinned out. We nailed the washing/edible obstacle but the color obstacle is still quite difficult to get. Small adjustments one way or the other can make the blood look too brown, purple or orange when thinned out. Ideally we get it to the sweet spot where it looks like a nice, real red when first deployed and settled to a realistic dried bloodbrown over time.
We are also continuing to tweak the powder so its able to be applied to the skin more easily and discreetly. The powder works wonderfully for caplets, and would be crazy cool as a water activated effect on skin!
I am also playing with Fire Gels and starting data research on the effect of performance on the actor and audience. (See why Chris is vital! All over the place!). This is on top of still teaching, doing stunts and choreo! Soo, it may be a while till we finish but we planning on being around for a bit.
Monday, October 7, 2013
This is my job- fake crack pipes
We all know that Google keeps track of our searches in order to try to create a detailed profile of who we are, and what are preferences are. I often wonder what they must think of me (I also wonder if I am on any government watch lists based on some of the things I have researched).
For this show, I needed crack pipes. A fairly easy search sent me to several websites detailing how they could be made. One sent me to ask for a "straight shooter" at a liquor store. It is apparently a narrow glass tube, that I guess is used to mix up some types of cocktails, the liquor store had no idea what I was talking about, and I felt very awkward trying to explain why I needed this thing even though I didn't know what it was used for.
Next I went to a smoke shop/head shop. I explained that I wanted a narrow glass tube that would be the type that crack smokers would use to turn into a crack pipe.
The conversation involved lots of verbal gymnastics as the clerk at the store tried to help me while still saying over and over that he didn't know what I was talking about. "I would hope that no one would use anything I sell for such a thing. We only sell items intended for smoking LEGAL tobacco products. These small glass tubes over here look a bit like what you are describing, but see how they are meant to fit into this PERFECTLY LEGAL hookah?"
I filled the glass tubes with steel wool (the website I found suggested copper brillo pads that would turn a silver-grey color when heated) and used a lighter to burn the end of the tube.
It turned out pretty well (maybe a bit too much steel wool after looking for more
research images). But totally believable in the moment.
Friday, February 15, 2013
Fake Indian Lunch
In Disconnect one of the characters is eating lunch at his desk. We decided that the lunch should be contained in a tiffin, a small stacking tin that many Indians use to pack lunches.
In the top section, I added a few pieces of flatbread so that he could take a few bites at the beginning of the scene.
In the bottom half I created a "chickpea" dish with wooden beads and a few chopped up pieces of fake greenery, all coated in elmers glue to hold it together. Up close you can see the holes in the beads, but from the distance onstage they weren't visible.
Also, in a funny shopping twist, I called five different local Indian import and supply stores looking for this at the last minute (initially we had decided he would be eating a sandwich) in an attempt to avoid shipping costs and time delays, none of them had anything or could even recommend somewhere else that might.
After giving up on the local route, I went online to search and discovered World Market sells this one for $10, and stocks them in store.
Sunday, February 3, 2013
Wednesday, January 30, 2013
Stage Cacti
In the past I have had trouble when a cactus has come up as a prop needed onstage. I once gave up and bought a real live aloe vera plant, which the stage manager had to be responsible for caring for over the run of the show.
During my work on this show though I realized that small fake cacti are actually very easy to purchase, I was just looking in the wrong place.
You won't find cacti in the craft stores where I buy most of the rest of my fake greenery, but you will find a large selection of very inpressive fake cacti at pet stores. They are sold for people to put in terrariums with pet lizards and snakes and such.
I love awesome discoveries like this.
And will certainly be using more in the future.
For this particular prop I had another interesting challenge after finding the cacti.
There is a bit in the show where one character is over watering the cacti on his desk and killing them. He needed to be able to put a full cup of water into the dish holding the cacti without it overflowing.
To help with this, I used a sponge to create the sandy soil that the cacti were planted in.
With scissors and a matte knife I carved out the sponge to fit the tin I was using for a planter, and to fit around the base of the cactus plant.
Because of the precise fit (just slightly larger than the tin so it would squish in and hold) neither the sponge or the plant needed to be glued in. This makes it easy for the run crew to take out the sponge, and squeeze it to remove the water between scenes, allowing the actor to continue pouring more water in without a risk of overflowing.
Saturday, January 26, 2013
Cheap Lumber
Hey all my friends who buy lumber in Chicago, I saw this stack at the Crafty Beaver the other day. I can't believe I never knew they did this before, and will likely use this to save money on build projects in the future.
And for everyone else, I'm betting that other local hardware stores must have spare cutoffs as well. It would certainly be worth asking if you need shorter lengths for a project.
Tuesday, December 11, 2012
Crushed Shells
I discovered yesterday that Michael's sells bags of crushed sea shells.
Not sure when else it will come up,
but they look very pretty and shiny and expensive in this gourd that we use for one of the wisemen's gifts in The Black Nativity
Friday, November 30, 2012
Wedding Centerpieces
The centerpieces for my weddings weren't so much a craft project as a shopping project, but they did seem to tie right in to work.
I have a thing for stemware and glassware and decided that I wanted to use that for the centerpieces at the wedding.
The decision was made early, so for over a year leading up to our wedding I shopped. Because I was in the thrift stores so often anyway, the glasses were acquired fairly easily.
I'd start each visit to the thrift stores by shopping for the props I was currently needing for work, but before I left I would swing by the glassware and pick up anything in a saturated color.
I had a spreadsheet where I kept track of how many glasses I had of each color so that I would be able to create a good mix.
A couple months before the wedding we pulled all of the glasses out in my parent's kitchen, washed off labels and arranged the glasses into mixed sets of eight.
We re-wrapped the glassware in newspaper and bundled each set in an individual bag.
On the day before the wedding, as we were decorating the hall, all my helpful aunts were able to open one bag at a time and arrange it onto each table.
We put a tea light candle into each, which added to the warm, colorful glow of the room when the lights dimmed.
On each table we left a note inviting people to take glassware that they liked with them at the end of the night.
Everyone seemed to love the glasses and some even turned choosing glassware into a game for the night, walking around the room and scoping out the glassware on other tables, trying to find matchign sets.
The best part was that ended up with centerpieces I loved, which doubled as wedding favors that our guests loved and I spend and average of $1 a piece.
Tuesday, November 20, 2012
Hostess
The other day at one of our previews I had four different people come up to me with a bit of fear in their eyes. They wanted to know if I had purchased enough of the Hostess HoHos we are supposed to give away to audience members as part of an audience participation bit.
Did I know that Hostess was going out of business and that people had buying out all of their products off of the store shelves as quickly as they could be found?
Luckily I had purchased all of the HoHos that we needed for the entire run already.
Just a good reminder that it is always best to be prepared for the entire run as soon as possible. you never know when a product will be discontinued or a company will go out of business.
Did I know that Hostess was going out of business and that people had buying out all of their products off of the store shelves as quickly as they could be found?
Luckily I had purchased all of the HoHos that we needed for the entire run already.
Just a good reminder that it is always best to be prepared for the entire run as soon as possible. you never know when a product will be discontinued or a company will go out of business.
Sunday, July 15, 2012
Lessons I Forget I Know
Right now I am working on a production of Hamlet at Notre Dame's Summer Shakespeare Festival. I have an amazing assistant who is very eager to learn, and in working with her, and explaining my work to her, I've remembered some tips and tricks that I use on a regular basis and sometimes forget I know.
First, when antique and thrift shopping I take pictures, lots of them. It is obvious to take pictures of the things I think might be useful,
but I also take a picture of the price tag on the item,
and, when I need to establish the scale of an item, I also take a picture that includes my purse. I use the purse because it is a neutral item that I am guaranteed to have with me in a production meeting when we are discussing options.
Another trick I have learned to use is to label pictures and options that I send to directors and designers. It could be just numbers or letters, but it helps clarify email and phone conversations when you can't be in the same room with the rest of the team members.
This trick was actually reinforced when I neglected to use it recently. I sent a document of photos to the director and designer. There were six pictures on each page, two images of furniture piece. The director replied to the email that he loved the second table on the page, we had a few more exchanges about the size of the piece he had chosen and how it might function, and I made plans to purchase the piece when I returned to Chicago the next day.
Because there had been a lot of back and forth about several pieces, many of which would be serving multiple purposes in the show, I sent one final document with photos of all the pieces I planned to purchase with captions indicating which scenes we would be using them for. It was only upon receiving that final email that the director and I realized we had been speaking of different pieces. He did not realize that the first two photos on the page were of the same desk. His note said he liked the second table on the page, but he was actually referring to the second photo of the first table. We were able to clarify the discussion and I was able to purchase the correct piece of furniture.
The experience served as a reminder to me that there are reasons I take the time and energy to do a little bit extra. When I make an assumption that everyone is on the same page, I run the risk of making a very expensive mistake (I would have paid $250 for an non-returnable desk had I not realized the confusion).
Monday, June 4, 2012
Props Designer vs Props Master
I've been recently working on a very big, very high budget show. The set designer on this project is kind of a big deal, he has Broadway credits and TV credits and movie credits and has been working at the top end of the industry for over 30 years.
I recently had a very interesting discussion with him about the titles of props master vs props designer. Over the last few years working in Chicago I have started more and more to call myself a props designer, so I was a little taken aback when John (the set designer) told me that he found the term incredibly annoying and insulting. He feels that calling the props person a designer as well takes away from the credit he should be receiving, or in some way demeans his position as set designer. I understand his point, and while I don't completely disagree with him, I think that the situation always needs to be taken into account.
So to clarify, in my opinion there is a difference between being a props master and a props designer. When I am a props master, I expect to be working very closely with the set designer. I expect to be given research and input on what the furniture, set dressing and key props should look like. The set designer is someone who will look at photos of the 6 desks I have located, and make the final choice of which one to buy. If I am the props master, then I have a collaborative partner who will be taking more responsibility for the final look of the show (whether that credit is receiving positive praise or accepting negative criticism). I will, of course, be making many decisions about details, budget, and small hand props on my own (or else why bother hiring me), but the overall look of the production is mine to support, not to decide.
I call myself a props designer so often in Chicago, because in so many of the small storefront theatres where I work, I am not the same level of support from set designers. In so many cases, furniture, set decoration and the overall look and feel of the props are left completely to me to discuss and work through with the director. I usually make an attempt first to achieve collaboration with the set designer, sending photos and emails, and asking for research; it is only when I do not get the information I need that I start to make decisions without input from the set designer. I am perfectly happy to assume full responsibility for the final look of the show in those cases (at many theatres this has nothing to do with the quality of the designer, it is just the way labor has traditionally been divided), but with that responsibility should come the credit and title of designer.
My conversation with John helped me to clarify and articulate to myself these differences. When the conversation initially started (and for a few days after), I worried that I was being self-important and pretentious by calling myself a props designer. I worried that I should stop using the term for fear of annoying potentially important people. With a lot of thought I have come to the conclusion that the term has it's place. I need to be more careful about how I use it, and after articulating for myself where the line is between master and designer, need to apply the terms appropriately, but abandoning the term completely would be just as wrong as using it in all cases.
I recently had a very interesting discussion with him about the titles of props master vs props designer. Over the last few years working in Chicago I have started more and more to call myself a props designer, so I was a little taken aback when John (the set designer) told me that he found the term incredibly annoying and insulting. He feels that calling the props person a designer as well takes away from the credit he should be receiving, or in some way demeans his position as set designer. I understand his point, and while I don't completely disagree with him, I think that the situation always needs to be taken into account.
So to clarify, in my opinion there is a difference between being a props master and a props designer. When I am a props master, I expect to be working very closely with the set designer. I expect to be given research and input on what the furniture, set dressing and key props should look like. The set designer is someone who will look at photos of the 6 desks I have located, and make the final choice of which one to buy. If I am the props master, then I have a collaborative partner who will be taking more responsibility for the final look of the show (whether that credit is receiving positive praise or accepting negative criticism). I will, of course, be making many decisions about details, budget, and small hand props on my own (or else why bother hiring me), but the overall look of the production is mine to support, not to decide.
I call myself a props designer so often in Chicago, because in so many of the small storefront theatres where I work, I am not the same level of support from set designers. In so many cases, furniture, set decoration and the overall look and feel of the props are left completely to me to discuss and work through with the director. I usually make an attempt first to achieve collaboration with the set designer, sending photos and emails, and asking for research; it is only when I do not get the information I need that I start to make decisions without input from the set designer. I am perfectly happy to assume full responsibility for the final look of the show in those cases (at many theatres this has nothing to do with the quality of the designer, it is just the way labor has traditionally been divided), but with that responsibility should come the credit and title of designer.
My conversation with John helped me to clarify and articulate to myself these differences. When the conversation initially started (and for a few days after), I worried that I was being self-important and pretentious by calling myself a props designer. I worried that I should stop using the term for fear of annoying potentially important people. With a lot of thought I have come to the conclusion that the term has it's place. I need to be more careful about how I use it, and after articulating for myself where the line is between master and designer, need to apply the terms appropriately, but abandoning the term completely would be just as wrong as using it in all cases.
Wednesday, April 25, 2012
Desk and Pianoforte
For Pride and Prejudice at Lifeline Theatre, the scenes move very quickly. We had absolutely no time to be moving furniture on and off stage. Because of this fact, we needed one pieces to serve two different purposes, we needed this piece to be a desk in multiple scenes, and a piano forte in two others. I needed to cut out a section of the lid of the desk.
Once open the hinged piece could serve as the music stand and a rough keyboard would be revealed underneath.
On a side note, one of the most tragic parts of my job is that I regularly purchase beautiful, antique, solid wood furniture, and then I destroy it. That first cut makes my wince every time.
The trickiest part of the process was finding a way to hinge the panel invisibly. I knew even if I used the smallest piano hinges I could find, and chiseled out the joint to inset the hinges, they would still be visible. Luckily I stumbled across an old set of invisible hinges at the hardware store.
The edges of each hinge are made to be inset into the side of the board to leave the gap totally seamless when the hinge is shut. Here you can see images of the hinge in it's open and closed positions.
And here is the sides of the joint, chiseled out and ready to screw in the hinges.
And here is the hinge set into place.
After making sure the hinges worked correctly, I installed a pieces of 1/4" plywood underneath the flipping panel for the keyboard.
I painted the plywood white, added stripes for the white keys, and strips of gaff tape for the black ones. I have to admit, close up, the keyboard looks like it belongs more in "You're a Good Man Charlie Brown" than "Pride and Prejudice" but from a distance it looks great, and is almost always facing completely upstage so the audience can only catch brief glances of it.
All I needed from there was a small pieces of string to hold the panel at the correct angle when it was open, so that actresses could easily place their music.
Check it out. Final product open
and almost completely invisible when closed.
Once open the hinged piece could serve as the music stand and a rough keyboard would be revealed underneath.
On a side note, one of the most tragic parts of my job is that I regularly purchase beautiful, antique, solid wood furniture, and then I destroy it. That first cut makes my wince every time.
The trickiest part of the process was finding a way to hinge the panel invisibly. I knew even if I used the smallest piano hinges I could find, and chiseled out the joint to inset the hinges, they would still be visible. Luckily I stumbled across an old set of invisible hinges at the hardware store.
The edges of each hinge are made to be inset into the side of the board to leave the gap totally seamless when the hinge is shut. Here you can see images of the hinge in it's open and closed positions.
And here is the sides of the joint, chiseled out and ready to screw in the hinges.
And here is the hinge set into place.
After making sure the hinges worked correctly, I installed a pieces of 1/4" plywood underneath the flipping panel for the keyboard.
I painted the plywood white, added stripes for the white keys, and strips of gaff tape for the black ones. I have to admit, close up, the keyboard looks like it belongs more in "You're a Good Man Charlie Brown" than "Pride and Prejudice" but from a distance it looks great, and is almost always facing completely upstage so the audience can only catch brief glances of it.
All I needed from there was a small pieces of string to hold the panel at the correct angle when it was open, so that actresses could easily place their music.
Check it out. Final product open
and almost completely invisible when closed.
Subscribe to:
Posts (Atom)