Showing posts with label fake food. Show all posts

Saturday, August 9, 2014

Tea Sandwiches

For The Importance of Being Earnest at Oak Park Festival Theatre, I was lucky that these bread and butter sandwiches didn't need to be consumed, so I could save time and money by making fake ones. 
I started with a scrap piece of upholstery foam I had left from a previous project. 
 I cut it into small rectangles, around 1 1/4" wide and 4" long
 I then cut them in half width-wise by carefully wedging each piece between my scissors before cutting down.
 I used some leftover liquid latex in between the two halves
The put the pieces back together for a nice little bread and butter tea sandwich. 
Unfortunately I forgot to get a photo of all the tea sandwiches stacked daintily on the tray with the tea service, but trust me, it was lovely, and very convincing. 

Sunday, April 20, 2014

Fake Quiche

For the upcoming production of Five Lesbians Eating a Quiche, I needed quiche (obviously), a LOT of it. 

I started picking up pie plates at thrift stores as soon as I agreed to do the show. Within the show itself I needed about a dozen quiches, but the company also was very interested in having lots of quiche in the lobby as the audience is entering. 

It was decided I would aim for 50 quiches, so I set to work. 

I mixed up salt dough for the crusts. To save a bit of mess (as the flour tends to get everywhere) I mixed the dough in the sink. 
Then I pressed the dough into the pie pans. For clear glass dishes I had to make a full crust, but for the metal or ceramic dishes I could get away with just doing the sides. 
 To bake the crusts I preheated the oven to 400 degrees, put in the pans, then turned off the oven and left the pies in there for the rest of the day. This didn't all happen in one day, by the way. I made crusts every morning for a few days, then cycled through the steps as each quiche was ready. 
 Once the crusts were baked, I filled them with great-stuff expanding foam. 
 After the foam hardened and cured, I carved off anything that had expanded above the top of the crust

 I learned as I went that it works best to have an uneven surface on top, with all of the foam stopping about a quarter inch lower than the top of the crust. 


 My plan was to melt down wax, add yellow dye and pour it on top to finish the quiches. My first attempts didn't turn out as planed though. They looked too yellow, and the wax was too translucent. I ended up buying opaque taper candles from the dollar store to mix in with my bulk craft wax in order to get the opacity correct. 
 Wax can be tricky to judge because, when it melts, it is all transparent. It is hard to know what the color will look like once everything hardens and become whiter and more opaque. 
 After everything was melted down, I poured the wax over the great stuff, and then left it to cool. 
 Here are the same two quiches after the wax cooled. 
 The color is close to right, but the texture is all wrong. 
 Since the color was right I decided to start experimenting with fillings. I collected spare bits of past projects from my craft closet and set to work. 
 The first try was with these multi-colored pom-pom balls. I spread them over the foam, 
Then poured the wax on top. 
Once the wax cured, it looked like this. Better than the plain ones, but the texture was still not right, and it was too obvious what the pom-poms were. 

I ended up spooning a bit more hot wax onto the top of the quiche. I then strategically pressed it, piled it and moved it with my spoon until it dried, leaving a much more convincing texture, and obscuring the obvious shape of the pom-poms. 
 I tried again with bits of red pipe cleaner


 leftover fake leaves


 and rice- not my favorite


 And here are some of the results.
This is my first batch of 16, so I'm sure as I go forward they will get even better, and hopefully I'll find other filling options that give more interesting variety to the collection (I'm definitely want to try sprinkling the tops of some with real herbs while the wax is still hot). 

Tuesday, April 15, 2014

Bundt Cake

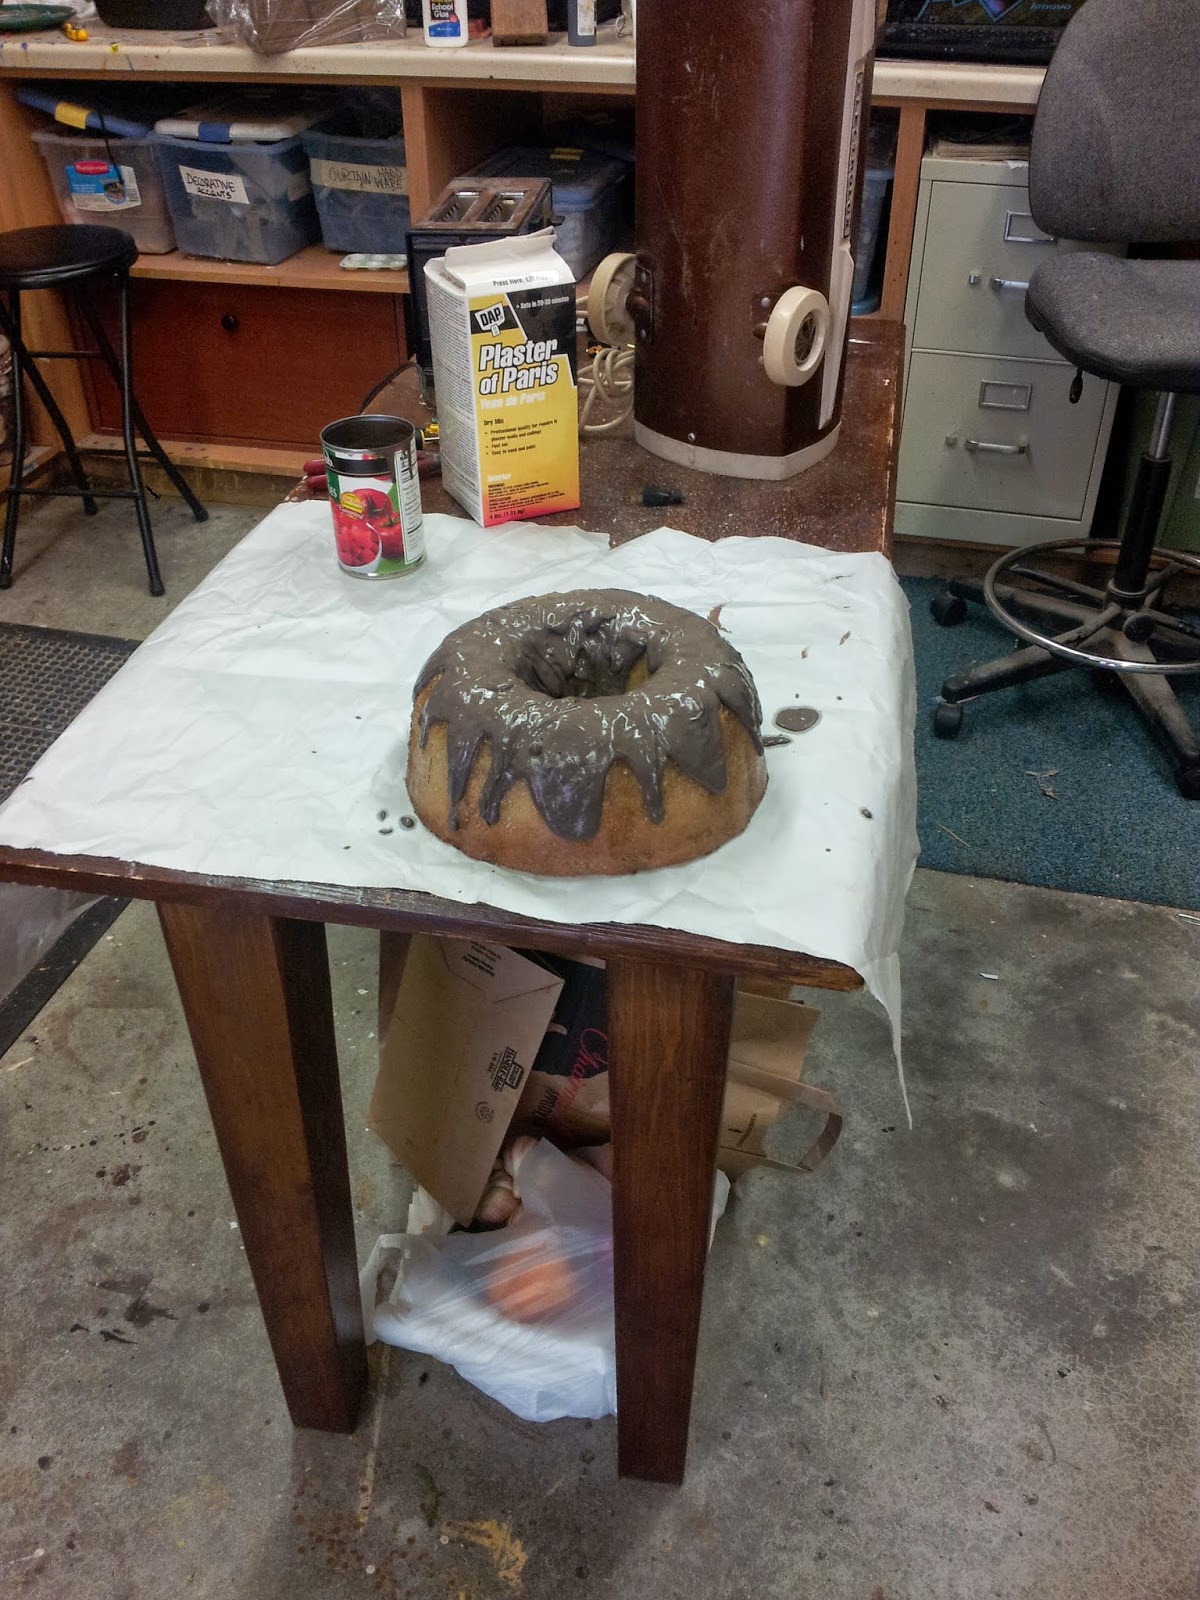
I made this cake last summer for Miracle on South Division Street at Peninsula Players. I just noticed the photos still on my phone and realized it never made it onto the blog.

I puchased an nice bundt pan for the show to use as set dressing. As a bonus I was able to use the cheap plastic liner for this project. We filled the liner with great-stuff and let it expand overnight. It expanded to overfill the liner, but the foam at the very bottom of the mold (the top of the cake) hadn't cured because no air could get to it.

We removed the cake from the liner, cut off the over-expanded bottom of the cake so it would sit flat, and allowed the top to finish curing. Since it was no longer curing inside a mold the top became a bit more uneven and bubbly, which didn't particularly matter for this project, but is good to remember for next time.

I sprayed the cake with some glossy wood tone for color.
After the paint was dry, I mixed some plaster of paris with brown paint to make an icing. Once the plaster had hit the right consistancy, I carefully poured it over the cake, allowing it to drip down the sides. 
 It looked great initially, but after the plaster cured, the plaster looked dull and dry. 

 I added a final coat of clear gloss sealer to the icing to get the final look. 

Tuesday, April 1, 2014

Liverwurst

After having success using modeling clay to make slice-able cheese and sausage last summer, I was excited to try it again for the liverwurst in The Suicide. 
This time the sausage didn't need to be sliced, but it did need to be used for all sorts of "bits" in this very physical comedy. The clay gave the liverwurst a very believable weight without it being dangerous to hit someone with, gently, in scene. 
It was rigid enough to be used as a fake gun in someone's pocket, and could be molded and manipulated by the actors for an endless number of phallic jokes.

The clay did get a bit dirty by the end of rehearsals and the run (which was only one weekend because this was a college show). For a longer run I would have needed to be prepared with backups. 


Tuesday, December 10, 2013

Scraps of dessert

For An Inspector Calls at Remy Bumppo, the show opens at the end of a dinner party. The characters are supposed to be finishing last bites of dessert as the maid cleans the plates and dishes away. I made these quick plates of lemon cake and custard from upholstery foam and wax. 
 I tore very small bits of upholstery foam from a block I had, 
 I arranged the bits onto plates and then poured a bit of wax that I dyed to look like custard over each piece. 
In addition to creating a nice appearance of sauce, the wax served as the adhesive to attach the foam to the plates.
We purchased one small loaf of lemon cake at the grocery store. We will slice the cake and freeze it. Each week the stage manager will thaw a slice of cake and put one bite onto one of the plates so that one of our characters can have a real piece of cake on her fork to eat before the plates are taken away.

Tuesday, November 5, 2013

Green Tea Frappuccino

For Broken Fences at 16th Street, we needed three Starbucks Green Tea Frappuccinos. The director would have loved to have something real, but we agreed that the cost of something real, and the labor involved in prepping something for each performance would be too much.
We decided on a compromise. The drink itself would be fake, but we would add whipped cream on top that would be real, that way the cream could stick naturally to the straw, the actors could take the straws out and lick the whipped cream off them, and could make a very convincing slurping noise by sucking on the straw.
 To start this project, again I went with model magic. It air dries, so that it could be formed to fit the cup and dry in place, and it comes in nice pastel colors that would be perfect for the tea. 
 I pressed the model magic into the cup, trying to fill as much space as possible, leaving a hole through the middle for the straw. 

 The finished dried product looked fantastic, and looked even better with the whipped cream on top. 

In all of my experience with model magic I had always found that it stayed strong with a firm skin. that seemed easy to wipe clean. I had the assistant stage manager rinse the cups out nightly in order to keep them from getting sticky or disgusting. Unfortunately it turns out that either the cream or washing was slowly eating at the Model Magic, the stage manager emailed me concerned that the actors were drinking dissolved clay. She wondering what the clay was, if it was toxic and if something could be done to fix the situation.
To fix the situation, I ended up using wax. I melted down a small amount on my stove, poured the wax into the cup and then slowly poured it back out, letting it coat and seal all the model magic. 
 The wax is far less porous, should not absorb the cream and water in the same way, and should rinse clean very easily after each performance. 


Tuesday, October 15, 2013

Edible Thai Noodles

For Broken Fences at 16th Street, we needed a few take-out dishes of Thai food. For three of the four dishes used thin strips of torn muslin, added beads or torn up paper pieces of different colors, and tossed them with some glue and a couple drops of food coloring. 
One of the dishes, however, needed to be edible. The director suggested rice, but with no microwave or stove that is easy to access at this particular theatre, I knew it would have been too much work for the ASM to prep something the actor would feel okay about eating nightly. 
Instead I decided to make a noodle dish. 
 I bought lots of small corn tortillas (bonus- super inexpensive) and cut them into this strips. 
layered and piled into the tub they look pretty convincing. They looked even more convincing when the actor got a few on his fork to eat them. 

Thursday, October 10, 2013

Quick appetizers

For Broken Fences at 16th Street Theatre, I needed a small tray of appetizers. They didn't need to be anything specific, no one ever interacted with them (aside from one character bringing them out and setting them on the table) and the audience never got a close look at them. 
I needed something quick, easy and most importantly, cheap. 
At the craft store I purchased one bag of beige Model Magic, and several small bags of pom-pom balls, for a total price of $7.
 I molded the model magic into log flat strips
 placed the pom-poms along the strips, 
 and then rolled them up. 
from a distance on the tray they worked perfectly. I think next time I will try with strips of felt for a slightly more uniform look.