Showing posts with label Paper Props. Show all posts

Monday, August 25, 2014

Printed Canvas Map

For Butler at Peninsula Players Theatre, we needed a canvas map to hang on the wall of the Civil War General's office. The set designer, Jack Magaw, provided the image and I had it printed on nice paper at Office Max, but it was still just paper. I needed it to be stronger, especially since it was going to be manipulated by the actors nightly. 
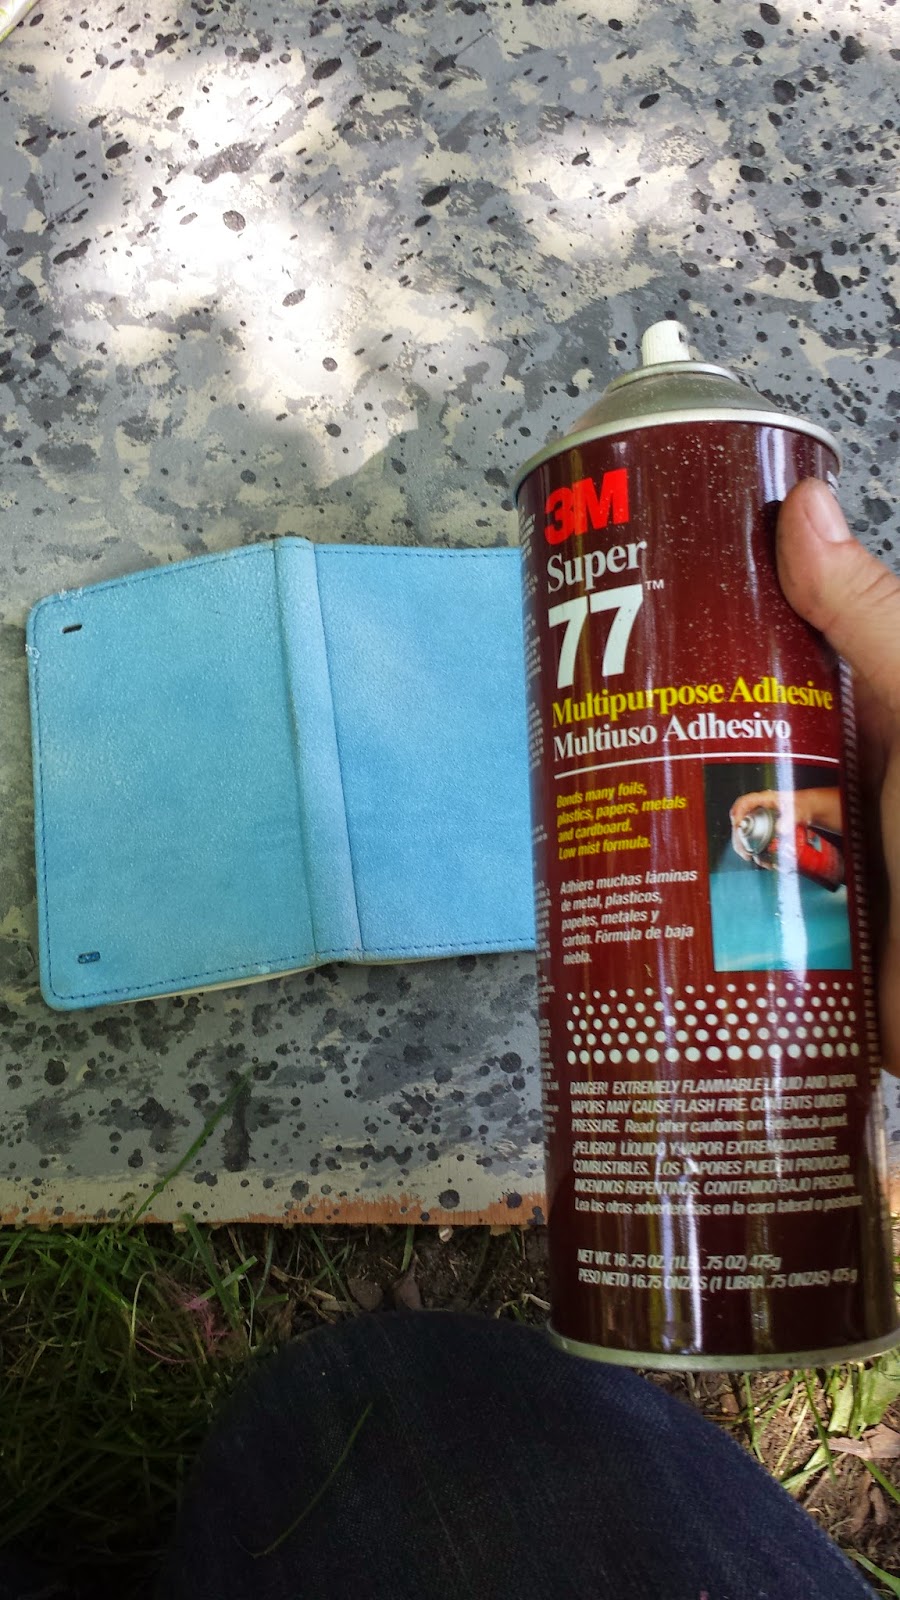
I purchased a piece of "duck cloth" canvas and used spray adhesive to attach the paper to the canvas, then went to the costume shop to borrow their serger sewing machine and serge the two layers together. 
Here is a close up of the two layers serged together from the front, 
 and on the back side. I am unsure of whether the method would have worked as well if I had printed the map on lower quality paper, but with the higher quality stronger paper, the sewing of the two layers together resulted in clean strong edges that I am confident will last throughout the run of the show. 
 To hang the map we purchased two 3/4 inch dowels and used the table saw to cut a groove into each. 
 We filled the gap with wood glue, slid the map into the slot, and then added brad nails to secure it in place. 
 The brad nails were a bit too long, so once the glue was dry we took the map over to the grinder to smooth off the ends on the back. 
 Here is the final piece laid out on the floor, ready to be hung on the wall of the set, and hopefully looking like it is ready to be rolled up and taken onto the battlefield. 
 And for good measure, and image of the canvas back side of the map too. 


Wednesday, August 20, 2014

Making Encyclopedias into Law Books

For Butler at Peninsula Players Theatre (Opening tonight), we need to fill multiple book shelves. I was lucky to find a good number of books in stock and even luckier to come across a Goodwill store selling sets of nice encyclopedias for $15 each (I bought 4 sets). Some of the sets looked nice and could pass as period, but two sets looked much more modern. 
What we really wanted for the show was a nice set of law books, but those are more expensive and hard to come by. Solution= turn the modern looking encyclopedias into law books, kind of like these. 

The first step was covering the spines of the books with Muslin. We used used a paint brush and some slightly thinned Elmers Glue for this. 
After the glue was dry we trimmed the muslin to a clean edge and brushed on a bit more glue to smooth them. 
We used a small brush to cut in around the edges. 
Then painted the entire spine of the book. We decided where the stripes on the spine would go and carefully measured and marked the lines across all the books so they would be the same. 
The top stripe was painted red and the bottom black. 
Then we painted over the whole things with a thin brown glaze to give all the color some depth and some shine. We used gold paint pens to add some detail stripes and squiggled in some fake writing for the titles. 
This was our first sample book. After finishing the spine, I still felt like the book looked very fake, so I painted the red cover a more muted green. It helped, but not enough. I realized the the biggest problem was my fake squiggled "writing."
I needed a fine print, something that looked like it had been done by a machine instead of by hand (but without buying an expensive machine). The solution we came to was stamps. 
We purchased a pad of gold stamp ink to experiment with and found that it didn't read very well. We had much more lucking using a gold leaf paint pen, drawing onto the stamp and then pressing it down on the book. 
Here are the first set of books after the first stamp. 
and completed with stamps on both stripes
For the second set of books I varied up the stripes a bit. 
And added stamps in four places on the spines. 
From any distance the words are impossible to decipher, but I love that our polite books all say "Thank You" in the bottom stripe of the spine. 


Friday, August 15, 2014

Covered Victorian Diary.

This quick little covered book was for the character of Cecily in The Importance of Being Earnest at Oak Park Festival. I started with a small amount of brocade fabric, a $5 "leather" journal from Staples and some decorative scrapbook paper. 
 I covered the book with spray adhesive, 
 and then carefully pressed the fabric down onto it. When doing this be sure to start on one edge and then slowly work your way across to avoid trapping any wrinkles. Also notice that the fabric piece I cut is much larger than the book. It is always better to be generous with this. Extra can be cut off if needed, it is very hard to add more fabric if there isn't enough. 
 I trimmed the fabric on the corners and the seams so that they would fold over neatly. 
 Then sprayed a bit more spray adhesive inside the cover and folded the fabric over onto the glue. 
 Finally I cut two pieces from the scrapbook paper the height of the book. 
 I sprayed them and then wrapped them around the edge of the journal to give it a look much more in line with the period books I found in my research (when in doubt in a Victorian play, add more detail). 
 And here is the final book. Cute and it matched nicely with Cecily's dress. 


Thursday, December 5, 2013

Newspaper with inserted articles

Period newspaper props are getting more and more difficult passing year. As color ink gets cheaper and more common, it is harder and harder to find generic newspapers without large color photos or ads. At one point I could just remove the cover pages as interior pages rarely had color, then the color spread to those pages too. Just recently, my go-to generic newspaper, the Wall Street Journal started printing with color ads and photos on all the pages.
It is also difficult to print your own newspaper. You need a large format printer, and many print shops will refuse the hastle of printing onto newsprint, even if you bring the paper in yourself. It gets tangled and jammed in the printers easily because the paper is so thin.
For newspaper props that don't take a lot of wear and tear, this is my solution.
 I start with a small drawing pad of newsprint. I bought this one several years ago and it has lasted me through multiple projects.
 The pad is 9x12, so each sheet needs to be cut to 8.5 x11 to fit into my home printer.
 I pull images offline and type out a few headlines,
 Then glue the articles and headlines into my purchased newspaper to cover up the color photos.On this one I added the photo of the Titanic, the headline about war, and the small section of a period newspaper under the photo (to cover the larger photo on the page).
Since newsprint is so thin, the extra layer of print tends to blend seamlessly into the base paper and not cause too much stiffness. 
This is easier to do if you buy the paper you are going to be gluing into first, then you can measure the areas you are going to need to cover and format your images and text columns to fit. 

Friday, October 25, 2013

Reusable "wax" seals

For Northanger Abbey, at Remy Bumppo Theatre, we had a series of letters (it seems like all Jane Austen plays have lots of letters) The director asked that all of the letters have wax seals on them. 
 To make the wax seals I started with sheets of circular label stickers from the office supply store.
 I added hot glue to the top of each sticker, creating a rough outline of the circle and filling in randomly in the center, then painted them with two coats of red paint.
 Once everything was dry they were easy to remove and stick to the letters. 
It was also fast and easy enough to make that I was able to create four full sheets. There were plenty of spares to leave with the stage managers to stick to new letters if the old ones wore out. 

*side note- I always try to create multiples of paper props to leave with the run crew as paper can be easily damaged or destroyed during the run of the show. I also often email digital copies of the paper props as an additional backup measure. 

Saturday, August 10, 2013

Letters

It was important to me, that the three letters we needed in Twelfth Night at Oak Park Festival be distinguishable from each other. 
The first, a fake love letter, was printed on this cloud and rainbow paper I had leftover from another project. 
The paper was not wild, but just unique and silly enough to make it distinctive (and recognizable the next time it appeared). The text was printed on the plain back side so that the interesting side was more visible to the audience while the actor was reading it.

I decided the second letter would be written on a cocktail napkin. As opposed to tearing napkins and writing that same note over and over I printed out the copies of the note on thin printer paper, 
 Then I cut them out and used modge podge to attach them to the napkins. 
They were still floppy like napkins, but sturdy enough to hold up while being a bit abused during a humid outdoor performance. 
The third letter was printed on a sheets of yellow legal tablet paper. 
Did you know that you can carefully tear a sheet off of one of these pads along the top perforations, and feed it directly through a printer?
You can!
The girl at the print shop at Office Max was super surprised
And if you use a handwriting font (I usually download them from dafont.com), it looks authentically handwritten even very close up. 

Friday, March 1, 2013

Poster Rig

 For The City and The City, at Lifeline Theatre we had the interesting challenge of attaching fliers and posters to the walls over the course of the show, and then needing to take them down halfway through. We experimented with various poster putties and sticky dots, but they either didn't reliably stick to the walls (nothing like pieces of paper randomly falling during serous moments to distract actors and audience members), or they stuck too well and took paint with them when they got pulled off quickly.
 For our final solution we ended up using magnets. I purchased these tiny, super-strong magnets at Michael's.
 We printed the posters on card-stock so that they could last the abuse of the run without getting destroyed
 And I attached the magnet to the back of each poster by placing it underneath a large strip of clear packing tape.
 I added slightly larger silver screws to the walls in the places I wanted to hang the posters.
 The magnets were strong enough that as long as the actor started by lining up the poster close to the correct spot, the magnet would grab the screw and leave the poster easily hanging in position.
 From a distance the screws completely disappeared on the textured "concrete" wall.
And here it is filled with posters
 I was a bit worried about how to do the same trick on the brick side wall of the theatre, but as it turns out, there had been plenty of concrete anchors installed in the wall for various shows over the years.
 I picked to anchors in spots roughly where we needed posters, and screwed in a washer to make the spot visible to the actor.
They were able to stick posters to the brick wall just as easily as the built set wall.