I've never written about it on here before, but I was talking to another props master recently, and we were talking about money troubles and being freelance. I figured I should be honest. I have a day job.
I had a mild panic freak out about three months after I moved to the city. Money was tight, but things were starting to pick up a bit. I was hopeful. Then I found out that a costume designer I was working with had a day job cutting fabric and teaching classes at Joanns. This was a successful designer that I knew was working in multiple larger theatres around the city. She had been around for years. If she couldn't make a living doing it, could anyone? Is it absolutely impossible to make a living being a totally freelance designer in Chicago.
I am stubborn and hardworking, I thought, I can do it. I did some math and decided that I was going to be able to make it. For almost two years, each time money got really tight or I got worried, a big show seemed to show up and I had enough to continue on (not living well, mind you, this was always paycheck-to-paycheck stuff). I had just enough to hush that voice in the back of my head telling me that I would never make a living.
Finally, last November everything broke down. For a couple of weeks I was dead broke, eating cans of soup from the back of the cabinet, can't take a toll road today because I don't have the $0.80 broke. The worst part was that on paper I should have been fine. Between reimbursements I was owed and pay checks, I had three theatres that owed me, collectively, more than $4,000. Then my car broke down.
My parents were able to help me out with the car, my boyfriend was able to help me with some cash, some of the checks I was waiting for finally showed up, and I got through it. That was a bit of a turning point for me though. I was ready to look for a day job.
My problem was that I needed a day job that was consistent. I had tried working at Joanns, but shift work was too unpredictable. My schedule changed every week and I was never able do do things like plan meetings. The same applied to temp work. They wanted to know when I would be busy, but I never knew far enough ahead of time. I couldn't take a full day job without completely giving up propping. I needed 20 hours a week, roughly the same 20 every week (with a little flexibility). I needed to be able to plan production meetings and work calls around something and I needed time every week when I would be free so I could go shopping when the thrift and antique stores were open. I started asking around at the start of the year to see if anyone had any leads.
Around March I interviewed to become a nanny for a baby that was due to be born in April. I was offered the job in late April with a start date of June 1st. About the same time as the nanny job came up I started getting offers for summer gigs. I had enough offers to financially get me through the summer, and things were starting to materialize for fall gig offers. I could keep going, freelancing, watching things getting slowly incrementally better, or I could turn down half of the summer jobs I had been offered (all with good theatres I wanted to work with) in exchange for a bit of stability. I had to make a decision. I took the nanny job.
I watch a sweet baby girl two days a week now, and (though it sometimes requires more night and weekend hours than I used to work) I get all of my props work done during the rest of the week.
It might be technically possible to make a living doing props freelance, but I am no longer interested in proving it. My game plan now is to be a little more selective in the shows I take, make sure that I rock every show that I do (which should be easier when I'm not overwhelmed with too many shows at once), and build a solid reputation that I can use to earn that awesome full-time job doing props, when one of the few that exists opens up. In the mean time I have the comfort that comes with knowing where a little bit of money is coming from every single week.
Monday, December 5, 2011
Wednesday, November 30, 2011
The Red Balloon

The red balloon was one of the trickiest pieces to figure out in Goodnight Moon. We wanted it to be able to move around the room, tip side to side, and move up and down. After some crazy ideas involving fishing poles rigged with right angles, tracks and pulleys running around over the set, etc. we realized the easiest solution was yo make the balloon a marionette operated from the catwalk.
(Big shout out here to the run crew person who climbs the ladders, makes the balloon dance and then climbs back down a dozen times per show).

The balloon itself is just thick paper mache formed around a large rubber playground ball. It has four screw eyes around the sides where the strings attach and are run to the grid.

At the top of the strings is this this cross piece. Each arm corresponding to one side of the balloon. Instead of tying off at each point, I put an eye hook at each point and continued running each string through screw eyes, over the top of the crosspiece, and down to the handle where the operator will be holding the piece.

At the end of the handle all of the strings are run back to this fishing reel. The reel allows the puppeteer a wide range of up and down motion. Also, by counting turns she is able to hit designated heights consistently.

Hanging off the end of the crosspiece is this clip. The clip allows the puppeteer to clip into the grid where ever she is over the stage. The balloon clips into the grid, balances on the bar nearby and the puppeteer can leave it whenever she needs to to run downstairs to operate any of the other puppets.

Friday, November 25, 2011
The cow jumps over the moon

By now it should be pretty clear that everything in Goodnight Moon moves or comes to life. The paintings are no different. For the cow jumping over the moon, we needed to cow to jump out of the frame three times and return again each time.

this is the, terribly uninteresting view from the back side of the wall. Here you can see that the dowel attached to the cow is leaned against a piece of angled 1x2 and attached to the wall with a bolt.

Jumping the cow out of the frame was just a matter of pivoting the dowel around the bolt.
We didn't want the cow to back up into the frame though, so once we got to this point we kept going until the dowel was pointing straight down. (it's hard to see in these pictures, but the 1x2 was attached to the back flat, and there was a gap between the 1x2 and the front flat the allowed the dowel to swing through).

To get the cow back into the frame, the run crew uses the 1x2 as a guide to slide the cow smoothly into place. Once it is at the right height, they simply slip the pivot bolt back into its hole and the cow is ready to jump again.

The final time that the cow reappears in the frame, she has just successfully jumped over the moon and has been given a gold medal to celebrate her bravery. During previews several kids asked the director after the show why the cow didn't have her medal when she returned to the frame. Answer: because it hadn't even occurred to us. So after the show I whipped up this quick medal.

I folded a piece of plumbers strap to fit over the cutout, covered it in white Gaff tape, with red and blue spike tape for stripes, and added a felt furniture glide painted gold.

The piece slides easily over the cow's neck while the cow is out of the frame between scenes.


Sunday, November 20, 2011
Dancing bookcase dolls
One of the more challenging and magical moments in Goodnight Moon, involved these dolls.
Early in the show the dolls are taken off the bookcase and given to Little Bunny in his bed. About halfway through the show he places the dolls back on the shelf. Moments later the dolls magically start to move.

To achieve the magic, both dolls were built with hooks coming out the bottom, that slipped into holes in the bookcase.


As soon as they were placed on the bookcase, the run crew member backstage quickly attached hooks to the loops.
To allow the space needed under the dolls, the majority of the books on this section of the bookcase were just bindings glued onto a piece of foam to hold them in place.

The mechanisms within the dolls were difficult to photograph (pretty much impossible with all the fabric and stuffing surrounding the hardware). I figured a drawing might be an easier way to explain the way the dolls moved.

The boy doll had wires in each arm The arm wires were attached to the wire going down through the bookcase, and a spring attached to the top of the dolls head. When the wire was pulled down it forced the arms up. When the wire was released the spring pulled the ends of the arm wires back and the arms went back down.
What is not shown in the drawing is that the wire coming out the bottom is run though a piece of PVC to prevent it from getting snagged on anything. There are also too large dowel rods run from the seat of the doll all the way to the top of his head so that pulling the wire actually stretched the spring instead of just squishing the doll.

The giraffe was rigged with a nodding head. A large trampoline spring was installed in his neck and heavy duty thread was sewn in from the font of his chin, though his body and down through his foot. when the wire was pulled from below, the spring was forced to bend and the giraffe nodded. When the wire released, the spring sprung back and the giraffe returned to it's initial position


I did have to insert some heavy bolts into the back legs of the giraffe to counter weight him. We were having problems with him tipping over when the string was pulled even slightly too hard.
Tuesday, November 15, 2011
Mantle Pieces
These mantle pieces were a quick project for Goodnight Moon.

To make them I used circles cut from 3/4" insulation foam and these glass bottles I found at American Science and Surplus (originally lava lamp bottles).
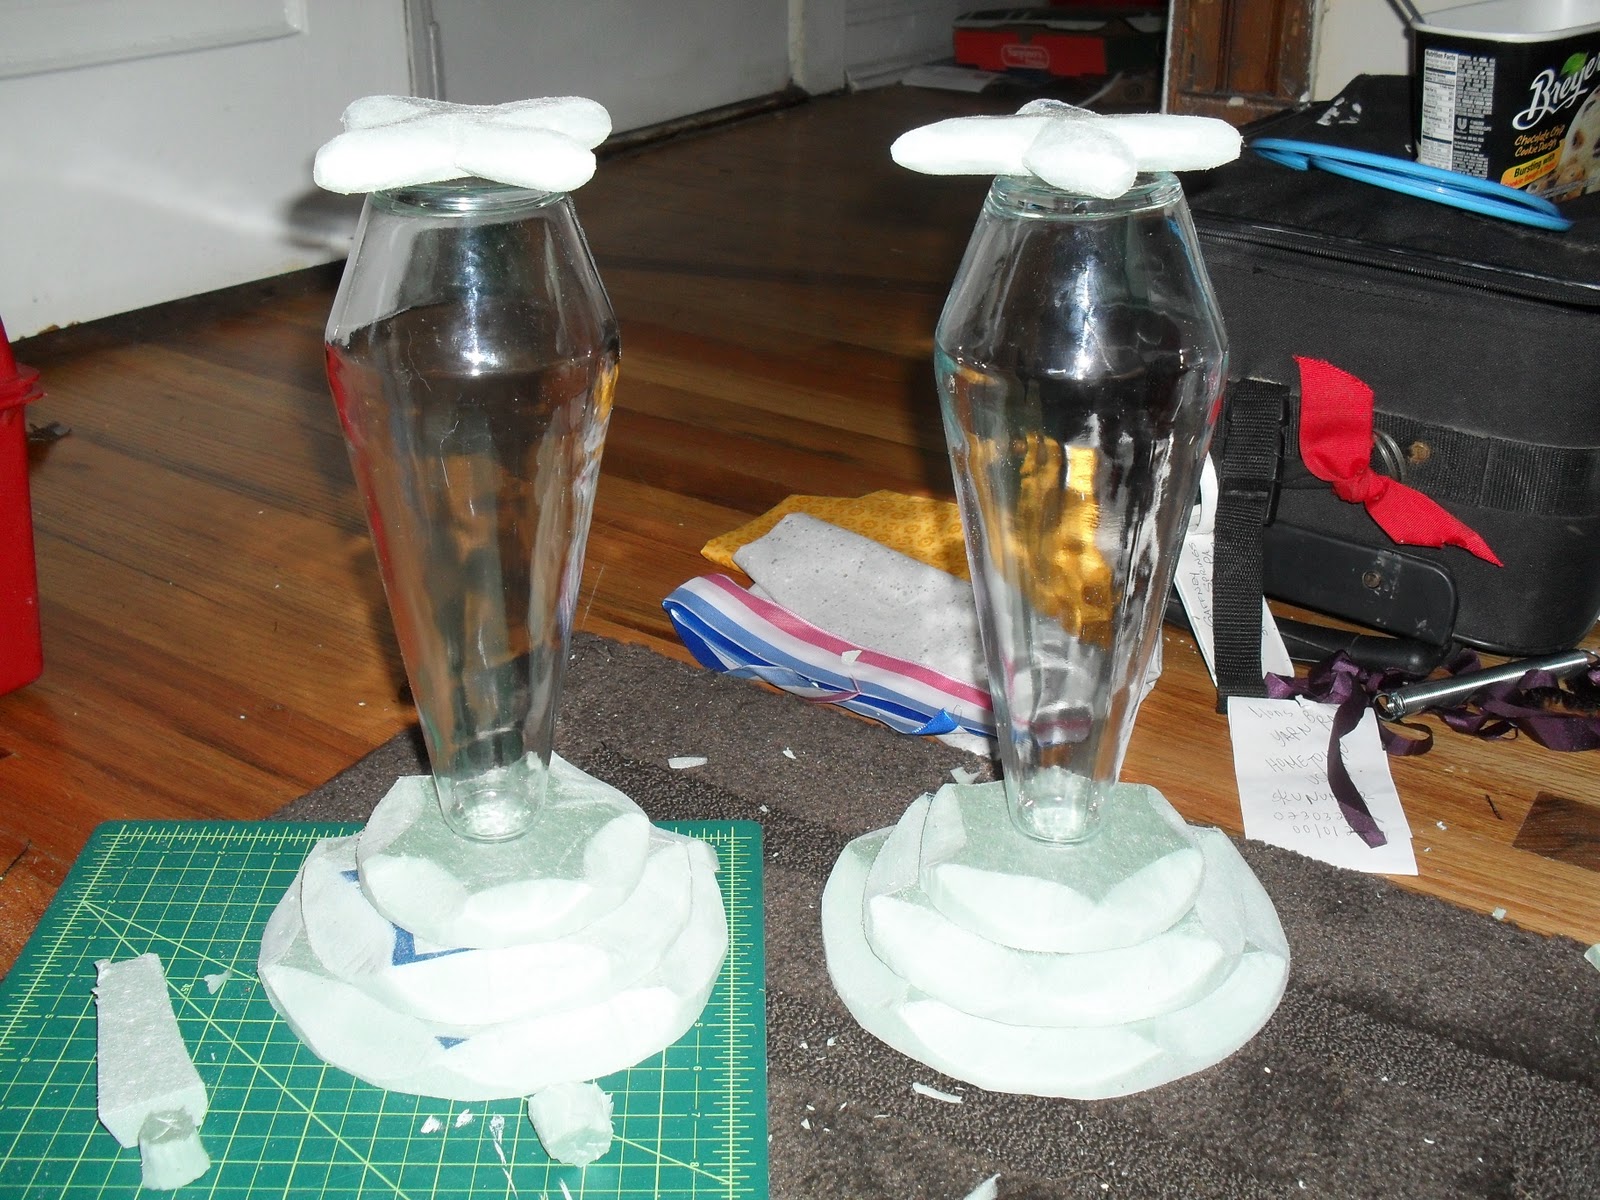
I carved the foam to shape, attached everything together with Liquid Nails.
Side note: make use when gluing foam that you use the Liquid Nails with the blue label. That is the one that is safe on foam. Other will eat through your foam, ruin you project, and produce some pretty toxic chemicals in the process

Finally I painted over all the foam with Elmer's glue to allow it to take paint, and spray painted them blue to match the clock on the fireplace.
Thursday, November 10, 2011
Magic Phone
For the phone in Goodnight Moon, I started with this lampshade from IKEA.

I cut out spaces at the top to provide a resting place for the receiver, cut out a space for the dial (which will later reveal a surprise face), and used a couple layers of duct tape to seal the top.

And a view from inside.

To solidify the receiver cradle I used epoxy putty to fill in along each of the remaining prongs.

For the phone's first magic trick I wanted the receiver to jiggle when the phone rang. I used three L-irons and a small machine screw to make this tiny lever.


From below you can see that when you pull the string, the L-Iron pivots to pop up and stretches the spring


For the phone's second trick, we wanted a face to be revealed when the phone spoke to bunny.


This project required a good deal of futzing to get to a point where the dial panel didn't get caught on anything on the way back up, and the string moved easily without friction from where the backstage crew was operating it. It also required a lot of rehearsal because the person who is pulling the strings backstage can't see what they are doing.*fingers crossed* it seems to be working well now.
Saturday, November 5, 2011
reusable knitting
In Goodnight Moon, our two little kittens are puppeted by wires attached through their bodies and up the the Old Lady's knitting needles, disguised as yarn.


This trick was especially appropriate for this show, but I think with a few alterations it might be a trick I come back to often when an actor needs to be knitting on stage. Especially an actor who didn't already know how to knit, would be freed from thinking about her hands and allowed to concentrate on the scene.
Sunday, October 30, 2011
...and then it gets cut...
Since I started working props, I have been told over and over again that props masters have a very high burnout rate, and there are days when I totally understand why.
 By far the worst things though, and the one that leads to the most frustration and burn-out, is cuts and changes. Unlike scenery, which can be difficult to change once it is built, props are pretty easy to change, so they will get changed. Often. They will also get cut. Often. Remember this beautiful rug that took Katy almost three full days of work to braid, coil and glue. They were worried about one of the rolling set pieces getting caught on it, so they decided it should be painted instead. The choice makes sense, and I agree.
Much of the job is based on luck, sometimes it's all in the timing (bones and brains around halloween= easy, the same bones and brains in June= frusterating, the same goes for other holiday decorations, outdoor toys, fake seasonal flowers and any other number of things you might never have realized stores only carry seasonally).
There is an unending number of skills you'll be asked to have; carpentry, sewing, upholstery, sculpting, painting, graphic design, puppetry, rigging and many others. It can get discouraging when you are expected to be a master of all these things, and are continually being confronting with another skill you need to learn.

This situation was sort of best scenario. Katy doesn't care too much as long as she gets paid, and I don't feel like my time was wasted. I am a little frustrated because I have plenty of other things I could have used Katy's help on, and would have been in a much better position going into tech if she hadn't spent her time on the rug, but overall I was able to pretty easily brush it all off and move on.
And to add an even happier ending, I pulled the artistic director backstage during previews, unrolled the rug and asked her if there was any way to use it. They are currently using it under all the little tables and chairs they have set up in the lobby with coloring books for the kids prior to the show, so at least someone is enjoying it (even if it is being quickly destroyed by being trampled by dozens of muddly little shoes each weekend).
And to add an even happier ending, I pulled the artistic director backstage during previews, unrolled the rug and asked her if there was any way to use it. They are currently using it under all the little tables and chairs they have set up in the lobby with coloring books for the kids prior to the show, so at least someone is enjoying it (even if it is being quickly destroyed by being trampled by dozens of muddly little shoes each weekend).
Tuesday, October 25, 2011
The value of ME
Recently, on apracticalwedding.com, a stationary designer, Julie from Up Up Creative conducted a one month "pay-what-you-can" experiment. She learned a lot about herself as an artist and business woman, and reading about her experiences and ideas helped me solidify many things that I've been struggling with as a freelance artist.
The core idea she hit on is, "What's valuable about my business is me."
Different people can pay me different amounts for the work I do (totally understandable, some theatre companies just don't have the funding that others have). The question is, how to scale the value I give to varying price points. As Julie pondered "If what's valuable about my business is me, how do I create a scale-able set of value propositions? Can I, and do I want to, provide varying amounts of me?"
In my work, I have sometimes found ways to provide varying amounts of me; projects that have fewer props, fewer unusual props, a more flexible time frame etc. I have started to realize though, that there is an amount that is too low; where what I can offer for the money a company has available to pay me, will result in a product that the company is not happy with and a I am not proud of. I can scale back the hours I spend working on a show. I can't scale back the quality of the work that I do. If the number of hours I have to spend on a project will require me to compromise quality in order to get it done, it's not a show I should be agreeing to take on.
Another element of the same idea, is that I am learning that I have better experiences with people who also see that value of me. I am learning that there is a huge difference between people who hire me because they want my experience and creativity and artistic input, and people who hire me because they have a big project that needs to get done and they don’t feel like doing it themselves. I’m also learning that the amount someone can pay does not correlate with the way I am going to be treated, and while I need the people who can pay a larger amount, I will make an effort to work with people on more limited budgets if I know I am going to be treated well and appreciated.
Thursday, October 20, 2011
Miracle Milk
I discovered the greatest thing ever today. I have mentioned on the blog before my struggles with milk onstage. The question is, how do you do milk onstage that will keep under stage lights, doesn't need to be purchased new every two or three days, doesn't gum up actors' throats, is relatively cheap and doesn't taste terrible.
Today I was at a magic store looking for a trick drinking glass and the store owner mentioned this product. I bought some immediately.

As soon as I got home I gave it a try. I put six drops in this small glass of water, swirled it, and got this result.

It's a little thin looking, but would still read from stage pretty well. It clumped a bit around the droplets and I think in the future I will mix it in a jar or pitcher where I can shake it really well instead of just swirling it in the glass. I was pleasantly surprised by the taste too, which was almost non-existent.
So this stuff is super cheap (this little $5 bottle will last me pretty much forever), it won't go bad, can be prepared quickly and easily by a run crew person each night, tastes like water and won't gum up any throats!
Saturday, October 15, 2011
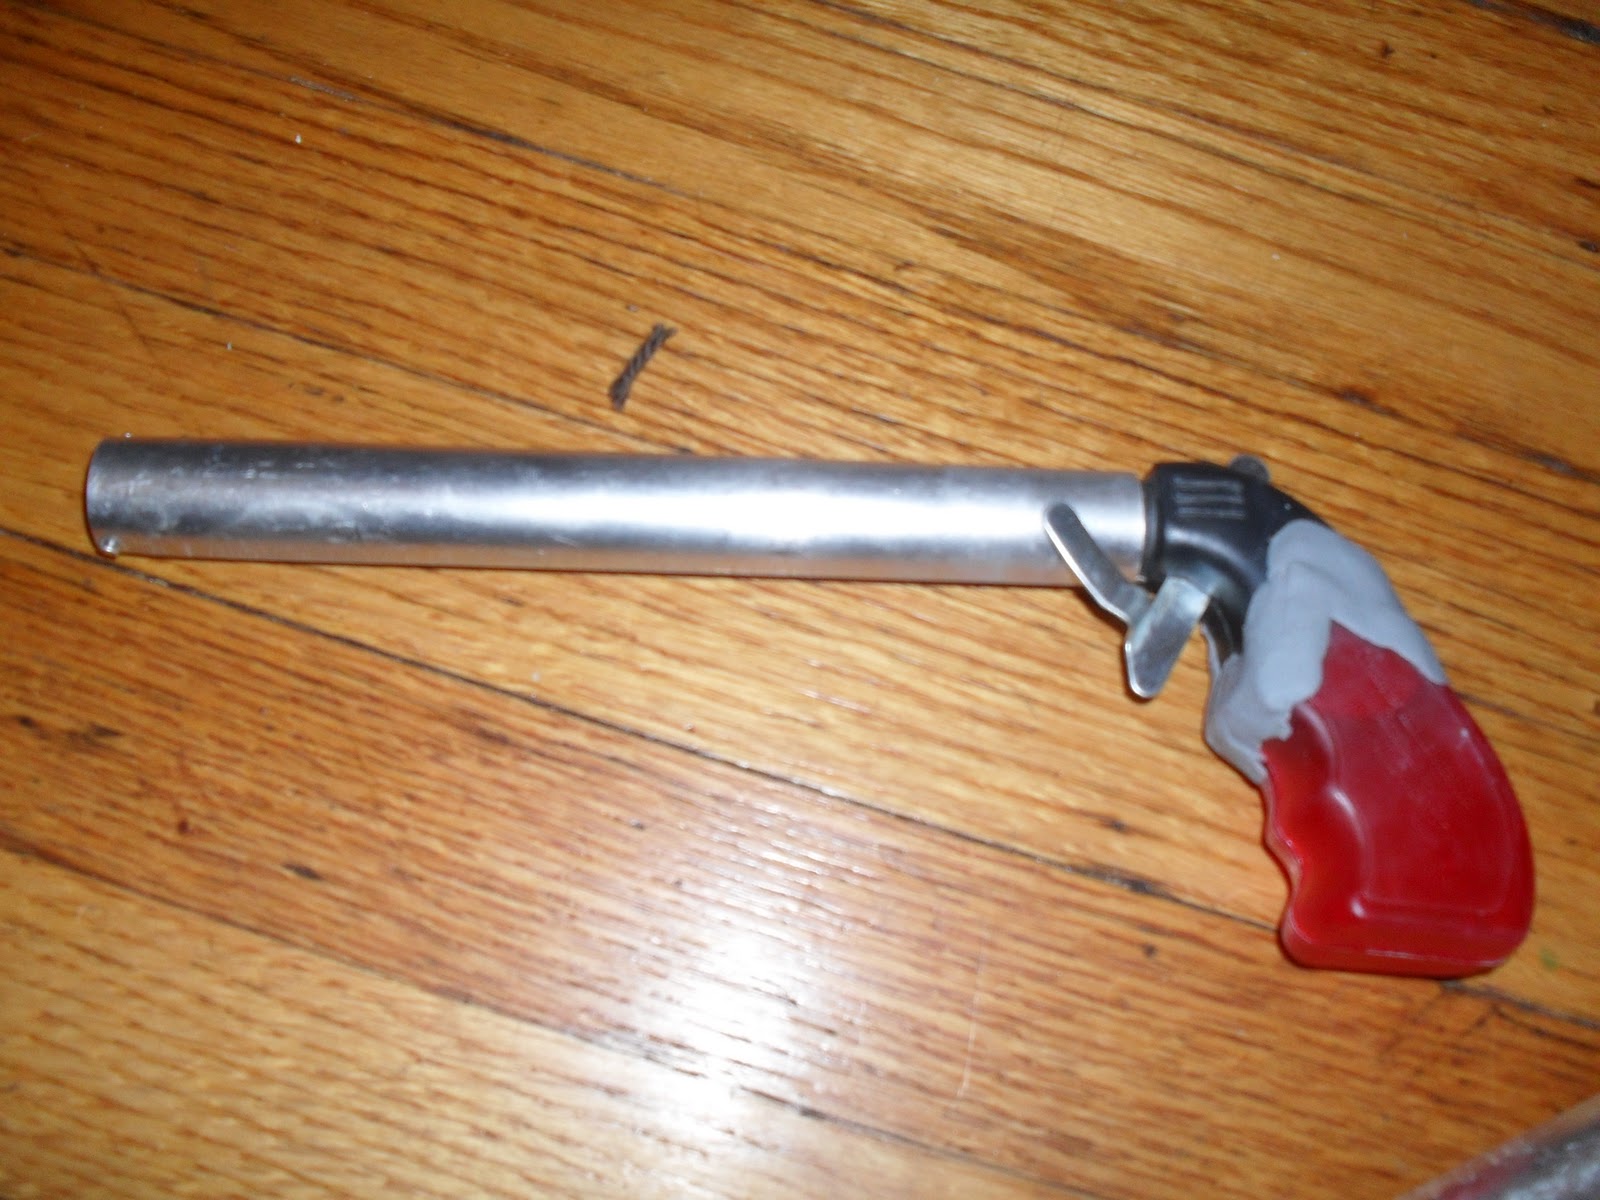
Bang-Flag Gun


I purchased three guns from the dollar store to use to beef up the handles.


Subscribe to:
Comments (Atom)


