Saturday, April 16, 2011

The Butterfly

The first and most important part of this butterfly is the beautiful fabric. Everything else has come back to letting the fabric shine.
I laid out the fabric, folded in half, measured and traced out the wings. I then cut the fabric while still folded so I ended up with two mirror images. I turned under the tiniest hem I could and stitched each wing all the way around. Ideally I would have done this with a Serger and gotten a cleaner edge, but alas I do not have access to one, so I hemmed, which resulted in the edges haves that rippled effect (I decided it looked okay and am calling it a design choice).
For the body I took a piece of PVC and ripped it in half. 
I installed wooden blocks at each end with mounting hardware
And used the rollers from spring-roll window shades to hold the wings.
The end caps were cut so that when the two halves of the tube were placed back together, there was an opening for the wing to be pulled through.
I attached the wings to the rollers with Gaff tape. You can also see the labels in this image to make sure the wings are installed correctly. Once the fabric is folded and rolled, top and bottom and front and back can be difficult to figure out. If everything else is correct, but you take the wing out of the wrong side of the body, you'll end up seeing the back side.
On my first attempt with the wings I attached grommets to the wing tip and hooked the puppeteer's rods there. the curved shape of the wings caused big problems though. If you can imagine drawing a line from the tip of the wing diagonally to the point where it attaches to the roll, the curve above that line was completely unsupported and instead of flowing beautifully like the rest of the wing, it flopped and sagged.
We tried stiffening it with iron-on interfacing, we tried supporting the the wing vertically with wire and plastic ribs. Nothing worked. 
The eventual solution was to move the imaginary diagonal up.
I cut off the old corner and sewed a piece of sheer netting onto the top of the wing, creating a diagonal line from the grommet down to the roller above the wing itself. The entire wing hung beautifully from this line.
I textured the body with a coat of masking tape
gave him antennae
and legs, and painted him dark brown
Then installed my fabric rolls, leaving just the sheer fabric and the grommets sticking out. 

The original plan was that, once installed, the spring rollers would allow the wings to easily retract into and be pulled out of the body night after night. That idea ended up failing because, to make everything fit, the rollers had to be taken out of the body and rolled neatly. I initially kept the spring rollers in though, because I believed they provided resistance to make the unfurling of the butterfly smoother. In the end though, the problems the rollers caused weren't worth the benefit (the same slapstick comedy problems always caused be roll-up blinds and maps and projector screens; constantly rolling backwards when you want them to lock in place and refusing to roll up when you  need them to retract).
I ended up taking the tubes apart and taking out the spring roller element. The sheer amount of fabric inside that small tube provided plenty of friction force to make the unfurling a smooth controlled motion. 

In the play our magical character pulls the butterfly body out of a wheelbarrow, presenting it as a bug before our three puppeteers enter. One takes the handle on the base of the body and the other two insert the grommets into hooks at the end of long dowels. They unfurl the butterfly wings and flap away.


Thursday, April 14, 2011

The Curious Child part 2

(To see how I made the curious child's body, check out The Curious Child Part 1)
For the curious child's head I started with a cheap inflatable soccer ball and molded the face onto it with clay.
I based the face off of a cabbage patch doll.
I covered the molded face with layers of paper mache, concentrating especially on the front of the head.
I cut a hole in the back of the head for access and then cut through the ball to pull the clay out of the front. Everywhere I didn't need to, I left the soccer ball for added support.
I used this image I found online as the basis for the working mouth.
After hollowing the clay out of the face I carefully cut out the bottom lip of the mouth and the jaw (though there wasn't much of one). 
I cut a wood block to fit the back of my cutout and attached a half of a hinge to it. I ran a cut off piece of a hanger through the hinge, inserted a screw-eye in the top of the piece for the spring and into the bottom for the pull string. I inserted the hanger wire into a wooden block on each end to give me an attachment point into the head.
In this image you can see the hinge installed in the head, the spring attached to the top and the hole where the chin used to be.
I attached my cutout chin piece to the wooden block and re-paper mached over all the screw heads and exposed cut edges I created when I installed the jaw mechanism.
To cover the gaps in the jaw that I needed to allow the jaw to move, I glued in a square of stretchy lycra fabric. The stretch allows for the jaw to still move up and down easily, while not creating wrinkles or gathers when the mouth is at rest. Again I paper mached around the edges to help blend it into the rest of the head.
I added yarn hair, and then reattached my cutout from the back of the head,
then painted his face. One step I now realized I skipped was sanding. On this stage and from this distance he still looks fine, but paper mache can be sanded once it is dry and a light sanding would have given my puppet a smoother cleaner finish.
The string that pulls down to operate the jaw was run through the neck and down the dowel rod into the body, where a simple tug on the ring can easily make the puppet talk.


I installed the head back into the body and added clothes 
Now it's all up to the puppeteer.
And the little puppet looks great mixed in with the crowd of "little ones"

Thursday, April 7, 2011

The curious child part 1

This is another large project the will end up being a two part post. The goal is a ventriloquist dummy style puppet. The puppet is one of a group of characters called "the little ones" (more on the rest of them in another post). He needed to be able to move his head, have a working jaw and usable hands. The puppeteer needed to be easily visible behind the curious child and she needed to be able to take the rig on and off quickly and easily.
The head is paper mache over a cheap inflatable soccer ball, which I will explain in detail in part two. In this post I will be explaining the framework of the body.
The hands were made out of Sculpey bakable clay. Before putting them in the oven I added screw eyes into the wrists to attach the hands to the arms, and straightened out some wire hangers to serve as the rods for the puppeteer.
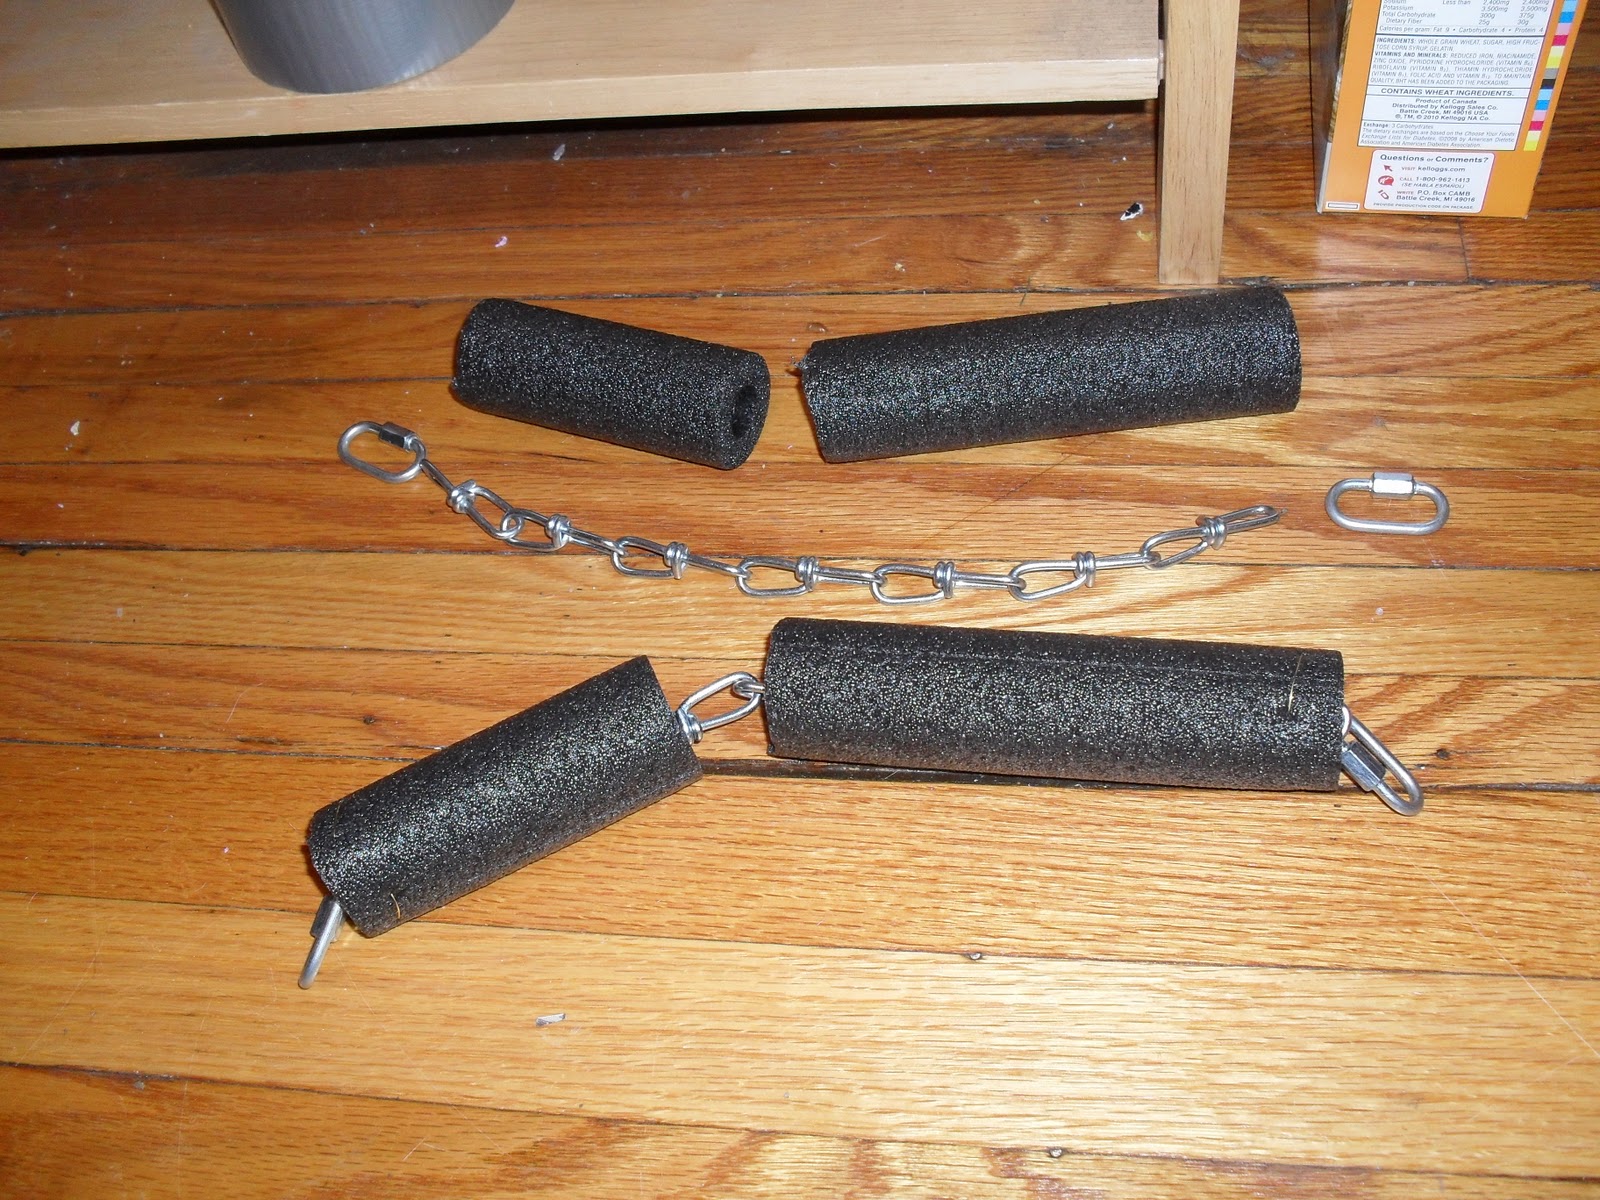
The arms were made of chain with hollow ethe-foam (sold in hardware stores as pipe insulation) to make the appropriate parts of the arm rigid.
Once the arms were assembled they were attached to a wooden plank shoulder/collar bone.
Also attached to the shoulder plate are two dowel rods that support the weight of the puppet freeing up the hands of the puppeteer.
The support dowel rods fit easily into PVC cups that are bolted to the puppeteer's belt. The rig allows her to quickly remove the puppet, then complete a quick change while leaving the belt on underneath.

Tuesday, April 5, 2011

National cuts to arts funding

I am not sure of the answer, but with all the talk of cutting funding to the NEA and other arts organizations, I wanted to take the moment to attempt to define the problem, at least as I see it.

First, the reason I believe that arts are an important is that the arts are the place in our culture where innovation happens. Within the conversations of art we can start conversations about family, politics, social problems and outrageous, innovative solutions. The arts serve as a venue where the common man can stand up and be heard.

It has been said that "the arts are the flower of a free society." This isn't just a pretty metaphor, it's a perfect, detailed one. A plant doesn't flower unless it is healthy. The arts can't flourish unless society is free. If the arts start to die, it is probably a sign that we are becoming less free and independent thinkers.

The arts also parallel the biological function of a flower in that the arts are the place where our society reproduces, where new ideas are born and grow. These new ideas may not seem practical in the moment, but those same, freely expressed ideas are the ones that inspire the innovation, individualism and free expression that continue to make our country a leader in the global economy.

It is for these reasons that I understand the arts to be vitally important to the survival of our society. It is for these reasons, I believe, that since the ancient Greeks, major governments have made it a point to support artists and the arts.

Conservatism is defined by a desire to keep things as they are or as they have been. Conservatives generally desire for progress and change to occur as slowly as possible, and desire to maintain the status quo. The flowering of new ideas, voicing of radical opinions and exploration of controversial topics that the arts inspire work directly against the desires of conservatism.

I am not suggesting that the majority of conservative Republicans in our government are conspiring to stomp out speech, innovation, exploration and change (though in doing so they are preserving the power of the current elite, which could be seen as serving their interests).  I do believe however that those conservative decision makers lack an understanding that the arts have these powers. Conservative politicians are likely to have come from conservative families. More than likely they would not have been exposed to the kind of art that creates real and positive change. When they think of artists, the mental pathway has not been laid for them to logically connect the art of the moment to the social movement, entrepreneur or political activist it will eventually lead to. Unless we are taught to see it, there is no direct visual evidence to show a casual, one time observer, that this slam poet, fringe theatre company, dance concert, photographer or choral group is vital to the everyday operation of our society. And so a conservative politician confronted with  a budget crisis does what any of us would do, they cut the things that appear most indulgent and unnecessary.

So the problem we are faced with is, how do we access a group of people, whose basic approach to the world is to avoid change, and convince them to continue to support an institution that serves to provide the change and the progress that our society requires to survive.

I don't have an answer yet, but I feel that framing the question this way gives me a better grasp of the situation. "They don't understand" is no help; "these are the specific things I need them to learn and understand" is much more productive, and I feel that if I continue to attack the problem from this angle, I am going to find a way to change minds.

Monday, April 4, 2011

Giant hands part 1

This is a picture of the beginnings of a very big project.
The goal is to make four pairs of articulated giant hands. They needed to be light enough to be operated easily by actors in a fight scene. Two pairs needed to go from an open hand to a fist and two of them needed to point.
I used the basic measurements of my hands and multiplied by three. I then spent a long day at the chop saw cutting three finger bones and one hand bone for each of the 40 fingers
For the joints of the fingers I used the nuts from toggle bolts.
I pre-drilled through the PVC and the toggle nut (be careful, you might want to use something besides your hand to hold the toggle nut down while drilling into it), then I screwed them together. At first it looked like the screws were going to hold, but I later had to replace some of the joints with machine screws and nuts because the screws worked their way loose.
The springs in the toggle nut are strong enough to make some of the finger tip joints spring back on their own, but the ones closer to the knuckle need some help from gravity to open back up.
 After assembling all the fingers (with a lot of help from some awesome students) they were screwed to 1x4 bases
The inside of the base was filled with upholstery foam to sandwich the hand and make the pieces easier to control.
In an upcoming post I will show how we finish the framework of the hand, cover them with skin and rig them up to move easily and consistently. But for now check out the effect of the giant hands.

Wednesday, March 16, 2011

The Seedling Mile sign

When we were one week away from tech for Leaving Iowa, the director decided that one of the road signs we were planning on doing as a projection, would work better as a practical prop.
It needed to be light, easy to move, and look like this.

I kinda freaked out. I imagined hours and hours of careful stenciling to get all of that wording onto the sign, and I didn't have enough time left for that.
My brilliant production manager came to the rescue, however, and suggested foam craft letters. Perfect solution.

The base of the sign is just a sheet of pink insulation foam, screwed to a PVC stand and coated in a home made scenic dope (a mixture of latex paint, latex caulk and drywall mud).

I sorted the letters into piles to make it easier to form words (this was the most time consuming part) and hot glued the words from the research image onto my sign. I then used a foam brush to brush a copper paint over the letters. Since the letters were raised, very little of the paint got on the brown sign behind the letters and I only needed to touch up a few places.
As a quick solution for getting the smooth copper line around the border I painted strips of spike tape and stuck them to the sign.
From the front it looked really impressive, and thankfully that was how the audience saw it, because if you get a view from the side you can still see the edges of my multi-colored foam letters.