Showing posts with label Butler. Show all posts

Monday, August 25, 2014

Printed Canvas Map

For Butler at Peninsula Players Theatre, we needed a canvas map to hang on the wall of the Civil War General's office. The set designer, Jack Magaw, provided the image and I had it printed on nice paper at Office Max, but it was still just paper. I needed it to be stronger, especially since it was going to be manipulated by the actors nightly. 
I purchased a piece of "duck cloth" canvas and used spray adhesive to attach the paper to the canvas, then went to the costume shop to borrow their serger sewing machine and serge the two layers together. 
Here is a close up of the two layers serged together from the front, 
 and on the back side. I am unsure of whether the method would have worked as well if I had printed the map on lower quality paper, but with the higher quality stronger paper, the sewing of the two layers together resulted in clean strong edges that I am confident will last throughout the run of the show. 
 To hang the map we purchased two 3/4 inch dowels and used the table saw to cut a groove into each. 
 We filled the gap with wood glue, slid the map into the slot, and then added brad nails to secure it in place. 
 The brad nails were a bit too long, so once the glue was dry we took the map over to the grinder to smooth off the ends on the back. 
 Here is the final piece laid out on the floor, ready to be hung on the wall of the set, and hopefully looking like it is ready to be rolled up and taken onto the battlefield. 
 And for good measure, and image of the canvas back side of the map too. 


Wednesday, August 20, 2014

Making Encyclopedias into Law Books

For Butler at Peninsula Players Theatre (Opening tonight), we need to fill multiple book shelves. I was lucky to find a good number of books in stock and even luckier to come across a Goodwill store selling sets of nice encyclopedias for $15 each (I bought 4 sets). Some of the sets looked nice and could pass as period, but two sets looked much more modern. 
What we really wanted for the show was a nice set of law books, but those are more expensive and hard to come by. Solution= turn the modern looking encyclopedias into law books, kind of like these. 

The first step was covering the spines of the books with Muslin. We used used a paint brush and some slightly thinned Elmers Glue for this. 
After the glue was dry we trimmed the muslin to a clean edge and brushed on a bit more glue to smooth them. 
We used a small brush to cut in around the edges. 
Then painted the entire spine of the book. We decided where the stripes on the spine would go and carefully measured and marked the lines across all the books so they would be the same. 
The top stripe was painted red and the bottom black. 
Then we painted over the whole things with a thin brown glaze to give all the color some depth and some shine. We used gold paint pens to add some detail stripes and squiggled in some fake writing for the titles. 
This was our first sample book. After finishing the spine, I still felt like the book looked very fake, so I painted the red cover a more muted green. It helped, but not enough. I realized the the biggest problem was my fake squiggled "writing."
I needed a fine print, something that looked like it had been done by a machine instead of by hand (but without buying an expensive machine). The solution we came to was stamps. 
We purchased a pad of gold stamp ink to experiment with and found that it didn't read very well. We had much more lucking using a gold leaf paint pen, drawing onto the stamp and then pressing it down on the book. 
Here are the first set of books after the first stamp. 
and completed with stamps on both stripes
For the second set of books I varied up the stripes a bit. 
And added stamps in four places on the spines. 
From any distance the words are impossible to decipher, but I love that our polite books all say "Thank You" in the bottom stripe of the spine. 


Wednesday, August 13, 2014

Civil War Period Pen

Last week the stage manager for Butler at Peninsula Players Theatre asked me after rehearsal, "Greg wants to know if the General would be using a dip pen or a fountain pen." I started to answer and then realized, I had no idea. I told him I would do some research and then get back to them for rehearsal the next day. 
In my research I discovered that the fountain pens that we know of today were patented in the 1880s, about 20 years after our play took place. Prior to that though, many companies were creating their own versions of something similar. Designs hadn't been perfected yet and could sometimes be leaky, or write a bit inconsistently, but people were using them. Based on this information I told stage management that the actor was free to make the choice himself. 

He decided he would like to have a fountain pen, and then I set to work finding out what that would look like. As it turns out, examples of such pens are very hard to find. I ended up seeing three that all seemed to have this basic design. The body and the nib of the pen were very similar to a recognizable fountain pen (the first image has the nib removed). Then they have the long retracting plunger. It looks to me like this pen would be placed in a pot of ink, and then the plunger would be pulled back to draw the ink up into the reservoir. 

I was excited about my new knowledge of period pens, but at a bit of a loss for how to make one (purchasing is not an option, the one pictured above is on sale on ebay for $2200)
When scouting around for materials I came across these cheap aluminum knitting needles. I was able to buy several sets in different sizes so I could experiment with one fitting snugly inside another. After cutting a few apart, I discovered this purple and gold combination was the best. 

 I cut the needles to the length I needed, leaving the end on the purple one. 
 I wrapped the end of the purple needle with just a bit of tape to ensure a snug fit. 
We wanted to make sure that our pen was still functional, so I took apart this cheap ballpoint pen to use the ink. 
 And slid it into the center of the tubes. These photos are from the second pen I made. When I made the first one I had to experiment a bit with the length of the tubes so that inner purple tube didn't get caught on the ink after it was pulled out. 
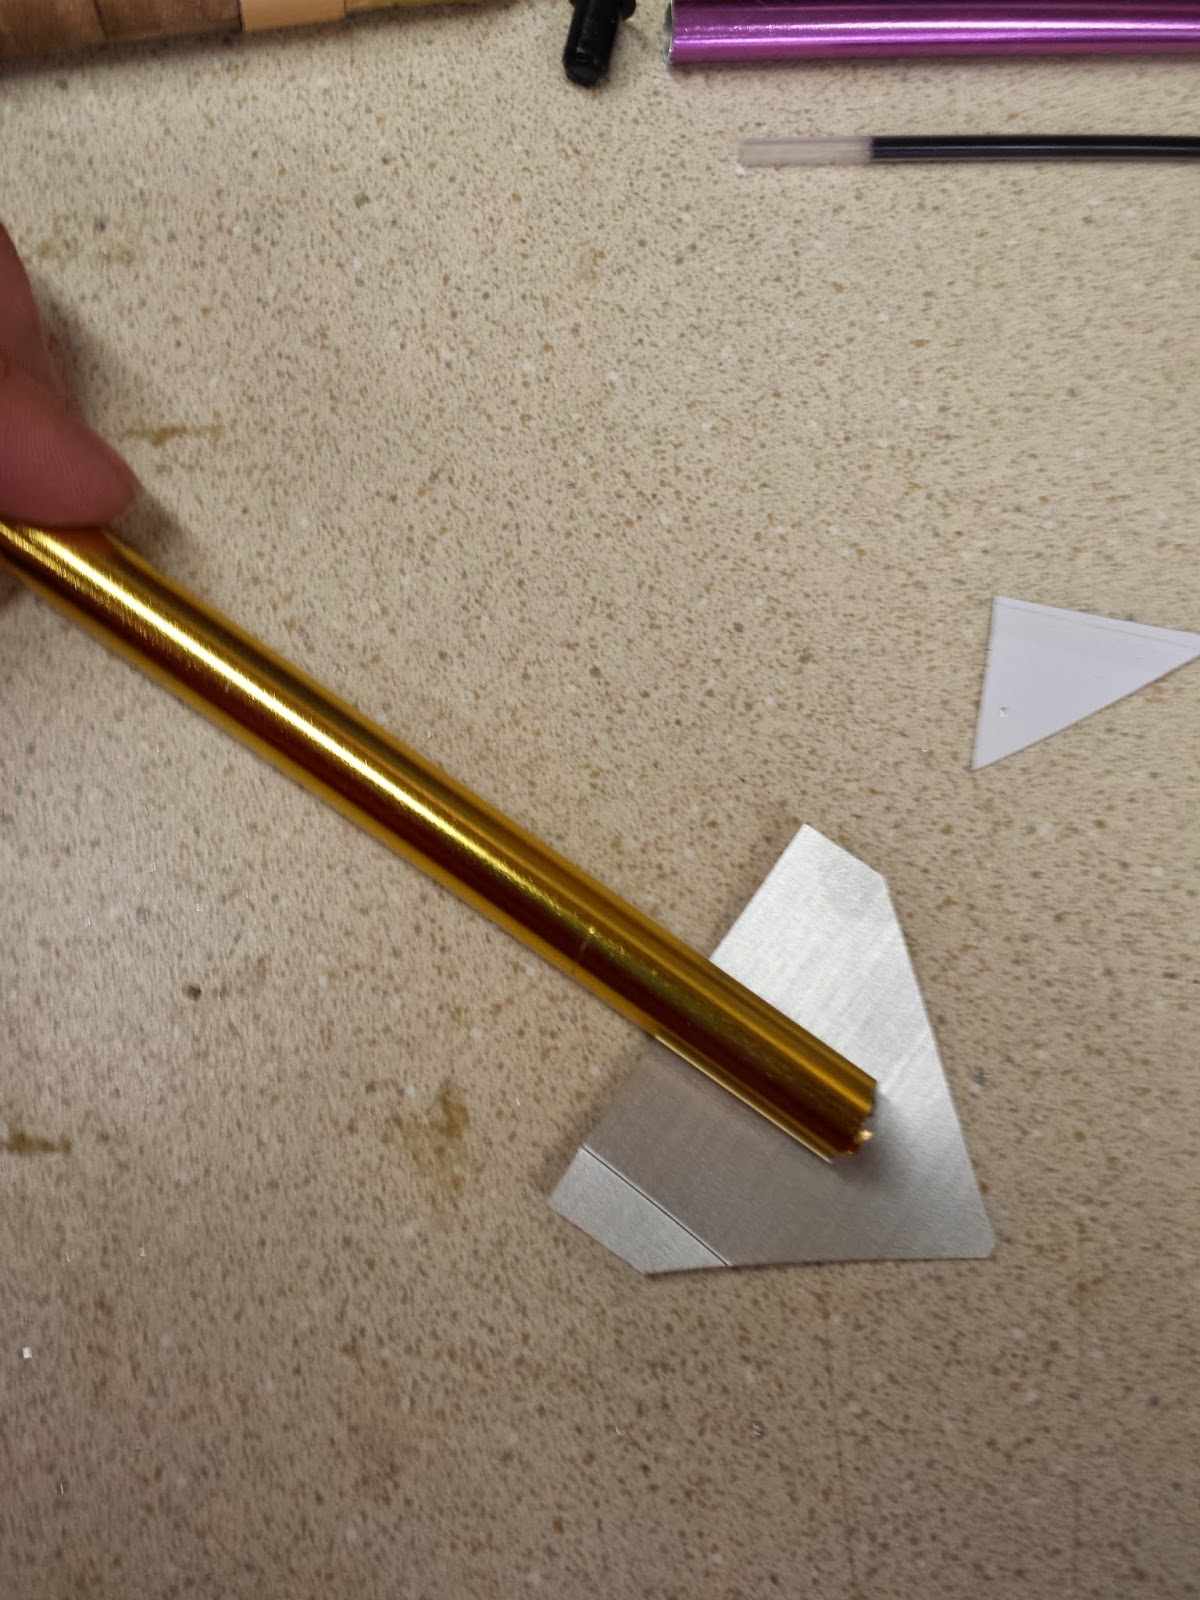
 To make the pen nib I cut a triangle shape from some metallic gold contact paper we had in stock (also seen in the previous pic).
 I simply wrapped the tape around the pen base to form a fairly convincing nib. 
  I then filled in the nib with hot glue, to make the nib more sturdy and to hold the ball-point ink in place.
 I used this wood-grain contact paper to add a bit of visual interest to the center of the pen.
 Like so
 Then used strips of the same gold contact paper to add these three stripes. 
 A bit of gold paint to cover the purple needle and the hot glue on the pen nib, and the project is complete.
Here are the two finished pens, and below is the research image. Not very far off, and from a distance, rather convincing. 

Saturday, August 9, 2014

Civil War bag

For "Butler" at Peninsula Players Theatre, I needed a small bag stuffed with supplies for one of the actors. Usually, with a period play like this I would have to do a lot of research to get a good idea of what the bag may have looked like. Fortunately, with a Civil War play, a lot of the research has already been done and is easily accessible on sites used by Civil War reenactors. I was able to easily locate several images of white canvas "haversacks," and several sites that sold reproductions and even listed dimensions. I chose this one to base my bag on

I found some cut up pieces of an old drop cloth lying around the shop, which turned out to be the perfect fabric. I cut a 16" square for the front, a 22" piece for the back, and a long thin strip which I sewed in half for the strap.
I used a safety pin to slowly turn the strap inside out to hide the loose edges. 
Then I pinned the front and back together, cut the angles on the two bottom corners and stitched around the outside. 
Before turning the bag right-side out, I snipped the corners on the bottom so the seam would be flat and not bunchy.
I turned the bag right-side-out, cut a curve into the top edge of the back piece (the flap) then turned under the edge 1/2" and stitched it in place.
The costume shop manager was able to give me a bit of a broken belt to use for the bag closure. I cut off a piece about 6" long and stitched the end to the flap of the bag.
As a side note, I was a little worried about breaking the needle on the sewing machine by trying to stitch through the thick leather of the belt. As I have done before in these situations, I still used the machine, but I turned the wheel by hand as opposed to using the electric pedal. It takes a little longer, but allows me to control the needle a bit more so it doesn't get forced through somewhere it doesn't want to go. I still get the nice, strong even stitches of the sewing machine,, but don't risk breaking a machine that was not intended for such industrial materials.
I took another bit of the belt, about 4" long, and stitched it to the base of the bag, as a loop to hold the strap. I found a small buckle in our stock and stitched that on as well (that one I did by hand).
Here is a look at the finished closure. 
The final step was to sew on the strap. In hindsight, it would have been MUCH easier if I had thought the project through before starting, and had attached the handles to the back of the bag before sewing the front and back of the bag together. I was still able to get a good stitch line down both edges of the strap, on both sides of the bag, but it required lots of twisting and pulling the stretching of fabric to get my needle where it needed to be without accidentally catching some bit of fabric I didn't want under my needle.
Here is the strap nicely stitched in place. 
Here is the finished bag. 
And here is the finished bag loaded with supplies and ready to go into rehearsal. 
Total, the project took about 2 hours and was a very satisfying productive break between some larger projects.