Sunday, October 30, 2011

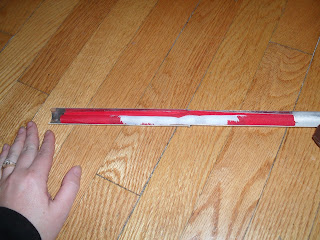
...and then it gets cut...

Since I started working props, I have been told over and over again that props masters have a very high burnout rate, and there are days when I totally understand why.

Much of the job is based on luck, sometimes it's all in the timing (bones and brains around halloween= easy, the same bones and brains in June= frusterating, the same goes for other holiday decorations, outdoor toys, fake seasonal flowers and any other number of things you might never have realized stores only carry seasonally). 

There is an unending number of skills you'll be asked to have; carpentry, sewing, upholstery, sculpting, painting, graphic design, puppetry, rigging and many others. It can get discouraging when you are expected to be a master of all these things, and are continually being confronting with another skill you need to learn. 

By far the worst things though, and the one that leads to the most frustration and burn-out, is cuts and changes. Unlike scenery, which can be difficult to change once it is built, props are pretty easy to change, so they will get changed. Often. They will also get cut. Often. Remember this beautiful rug that took Katy almost three full days of work to braid, coil and glue. They were worried about one of the rolling set pieces getting caught on it, so they decided it should be painted instead. The choice makes sense, and I agree. 

This situation was sort of best scenario. Katy doesn't care too much as long as she gets paid, and I don't feel like my time was wasted. I am a little frustrated because I have plenty of other things I could have used Katy's help on, and would have been in a much better position going into tech if she hadn't spent her time on the rug, but overall I was able to pretty easily brush it all off and move on.

And to add an even happier ending, I pulled the artistic director backstage during previews, unrolled the rug and asked her if there was any way to use it. They are currently using it under all the little tables and chairs they have set up in the lobby with coloring books for the kids prior to the show, so at least someone is enjoying it (even if it is being quickly destroyed by being trampled by dozens of muddly little shoes each weekend).

Tuesday, October 25, 2011

The value of ME


Recently, on apracticalwedding.com, a stationary designer, Julie from Up Up Creative conducted a one month "pay-what-you-can" experiment. She learned a lot about herself as an artist and business woman, and reading about her experiences and ideas helped me solidify many things that I've been struggling with as a freelance artist. 

The core idea she hit on is, "What's valuable about my business is me." 

Different people can pay me different amounts for the work I do (totally understandable, some theatre companies just don't have the funding that others have). The question is, how to scale the value I give to varying price points. As Julie pondered "If what's valuable about my business is me, how do I create a scale-able set of value propositions? Can I, and do I want to, provide varying amounts of me?"

In my work, I have sometimes found ways to provide varying amounts of me; projects that have fewer props, fewer unusual props, a more flexible time frame etc. I have started to realize though, that there is an amount that is too low; where what I can offer for the money a company has available to pay me, will result in a product that the company is not happy with and a I am not proud of. I can scale back the hours I spend working on a show. I can't scale back the quality of the work that I do. If the number of hours I have to spend on a project will require me to compromise quality in order to get it done, it's not a show I should be agreeing to take on. 

Another element of the same idea, is that I am learning that I have better experiences with people who also see that value of me. I am learning that there is a huge difference between people who hire me because they want my experience and creativity and artistic input, and people who hire me because they have a big project that needs to get done and they don’t feel like doing it themselves. I’m also learning that the amount someone can pay does not correlate with the way I am going to be treated, and while I need the people who can pay a larger amount, I will make an effort to work with people on more limited budgets if I know I am going to be treated well and appreciated.

Thursday, October 20, 2011

Miracle Milk

I discovered the greatest thing ever today. I have mentioned on the blog before my struggles with milk onstage. The question is, how do you do milk onstage that will keep under stage lights, doesn't need to be purchased new every two or three days, doesn't gum up actors' throats, is relatively cheap and doesn't taste terrible. 
Today I was at a magic store looking for a trick drinking glass and the store owner mentioned this product. I bought some immediately.
 As soon as I got home I gave it a try. I put six drops in this small glass of water, swirled it, and got this result. 
It's a little thin looking, but would still read from stage pretty well. It clumped a bit around the droplets and I think in the future I will mix it in a jar or pitcher where I can shake it really well instead of just swirling it in the glass. I was pleasantly surprised by the taste too, which was almost non-existent. 

So this stuff is super cheap (this little $5 bottle will last me pretty much forever), it won't go bad, can be prepared quickly and easily by a run crew person each night, tastes like water and won't gum up any throats!

Saturday, October 15, 2011

Bang-Flag Gun

 For Goodnight Moon  there is a bit where one of the characters uses an old cartoon-y bang-flag gun. The guns themselves can be purchased fairly easily online. The mechanism they use is surprisingly easy.

 The barrel is actually two pieces, attached at the end with a spring hinge.
 the flag is rolled up and hidden inside the folded barrel.
 The flag is weighted at the bottom, so when the barrel is opened the flag falls out and unrolls.
The trigger mechanism is just a simple lever. it wedges in place to hold the barrel shut and a quick pull allows the spring hinge to release and the barrel to open.
The guns I ordered online worked fairly well (I ordered extras just in case they fail later, they're pretty cheap and I don't entirely trust them), but they looked a little silly. The handle was too tiny for such a long gun.
I purchased three guns from the dollar store to use to beef up the handles.
After some experimentation I ended up using just one small piece of the dollar-store gun handle as an extension on the existing handle.
I secured it in place and smoothed out the seams using epoxy putty.
Finally I added the guard surrounding the trigger to give the gun a finished look.
You can see in the previous picture that I attached the trigger guard to both the barrel and the handle. I quickly realized that attaching to the barrel prevented the spring mechanism from working. I removed the epoxy putty from that connection and let the connection at the handle support the whole piece.
When the guns were assembled I covered the parts I wanted to remain silver with masking tape, and sprayed the handles brown.
I think they turned out pretty well, and much less awkward in scale than they were to start.

Thursday, October 13, 2011

Fake Braided Rug

For Goodnight Moon I needed a large circular braided rug for the center of the room. It needed to be round, grey (to eventually give a moon-like appearance) and 10' across. After a brief search online it became very clear that this was not something I was going to find. It had to be made.
Before I show you pictures I have to acknowledge my friend Katy who I hired to help me with this show, and who did almost all of the labor on this project.
A traditional braided rug is made from strips of wool, but wool is expensive and I wanted something thicker so I would end up with larger braids (and the process would therefor be faster.) The three colors of grey fleece were cut into roughly 2" strips and then braided together. Katy kept the braids somewhat loose to help speed the process.

to keep a rough idea of how far she was getting (and partially to keep the whole thing from turning into a tangled mess) Katy wound it on the floor as she went. 
Later, when Katy had used up all the fabric I bought we took the time to lay the whole thing out neatly and flatten the braids. It went from being roughly 4'-6" across to just at 6', something to keep in mind if you take on a similar project. 
Here is the rug after the first day. Unfortunately the 10 yards of fleece I purchased wasn't enough, so back to the fabric store. 
A real braided rug is time consuming and difficult because all of the braids need to be stitched together along the entire length of the spiral. To speed the process for this project we decided to glue our braids to a backing instead.
Katy stitched together two widths of grey canvas to get a 10'x10' square and then started gluing, spiraling out from the center. the gluing helped to spread the braids out to their widest to cover as much area as possible with each braid. 

The gluing also allowed us to leave small gaps (which add up over a 10' rug). With the grey canvas backing being a close enough color to some of the fleece, the gaps all but disappear from just a few steps back. 

As Katy was gluing the braids she discovered that we should have purchased longer glue sticks (she used so many, that adding new sticks was the most annoying part of the process). She also discovered that one giant long braid wasn't the best idea. If we had done it in shorter length pieces, she would have gotten tangled less, and spent far less time untwisting the braid to get it to lay straight. 

After laying out that same first day's braid on the canvas we had closer to 7' of diameter. We still need more, but this is a great start, and I'm going to bring pictures into rehearsal to make sure we want to go the whole 10' we planned before continuing. 


Wednesday, October 5, 2011

Dancing Lamp

The exciting and challenging thing about "Goodnight Moon" is that the whole room comes to life. For me that meant that there are almost no simple props. Everything becomes a puppet on some level. 
This first puppet is the table lamp. 
For the base of the lamp I used a round globe lamp I found at Ikea. I removed the electric that were pre-attached and turned it upside down. 
I cut 2 circles of plywood to anchor the ends of the neck of the lamp. In between I attached a spring (mostly with epoxy putty), that could bend to make the lamp dance. 
I attached strings to the edges of the top plywood circle, ran them through holes in the bottom circle and out the bottom of the lamp. Once the lamp is installed onstage I will run the same strings through holes in the table, around pulleys and off-stage where they can be operated by one of the actors unseen. 
 To give the lamp a more solid base I cut a circle of foam core with a slit to fit the cable. Once I am installing the piece onstage, this will be covered in the same blue fabric as the rest of the lamp.
 Once the tipping mechanism was functioning, I needed to make the shell of the lamp. I used a stretch dance fabric so that I could get a smooth, wrinkle-free line while still getting the flexibility I needed.
I made the cover much the same way you would make a slip cover for a couch. I wrapped the fabric around the lamp base and then began pinning the excess fabric until it fit tightly. When I removed the fabric the pins gave me an exact pattern for where I needed to sew darts to make a perfect fit.
 I trimmed away all the excess fabric and turned the sleeve right-side-out.
 Then all I needed to do was pull the sleeve back over my lamp and hot glue it in place.
 I purchased a lampshade that is held in place by the lightbulb so that I didn't need any extra hardware for that.
Finally I painted the lampshade yellow and added some rick-rack around the edges so that I could get a perfect match to the lamp in the book.
Unfortunately the first time they tried to use the lamp in rehearsal, the line I was using for the pull strings broke. When I brought the lamp home to finish rigging I replaced the strings with thick wire.
finally I ran the pull wires, and the electrical cable through a piece of foam wrapped in my blue fabric, and through holes I had drilled in my table. From here I will run lines through pulley and screw eyes, once we load the piece onstage, to where ever they need to be backstage.